
Adding Molding to a Kitchen Island
When we remodeled our kitchen, we spent over two months of nights and weekends working on the space. By the time we got to the kitchen island, we were worn out and the result was functional but a little boring.
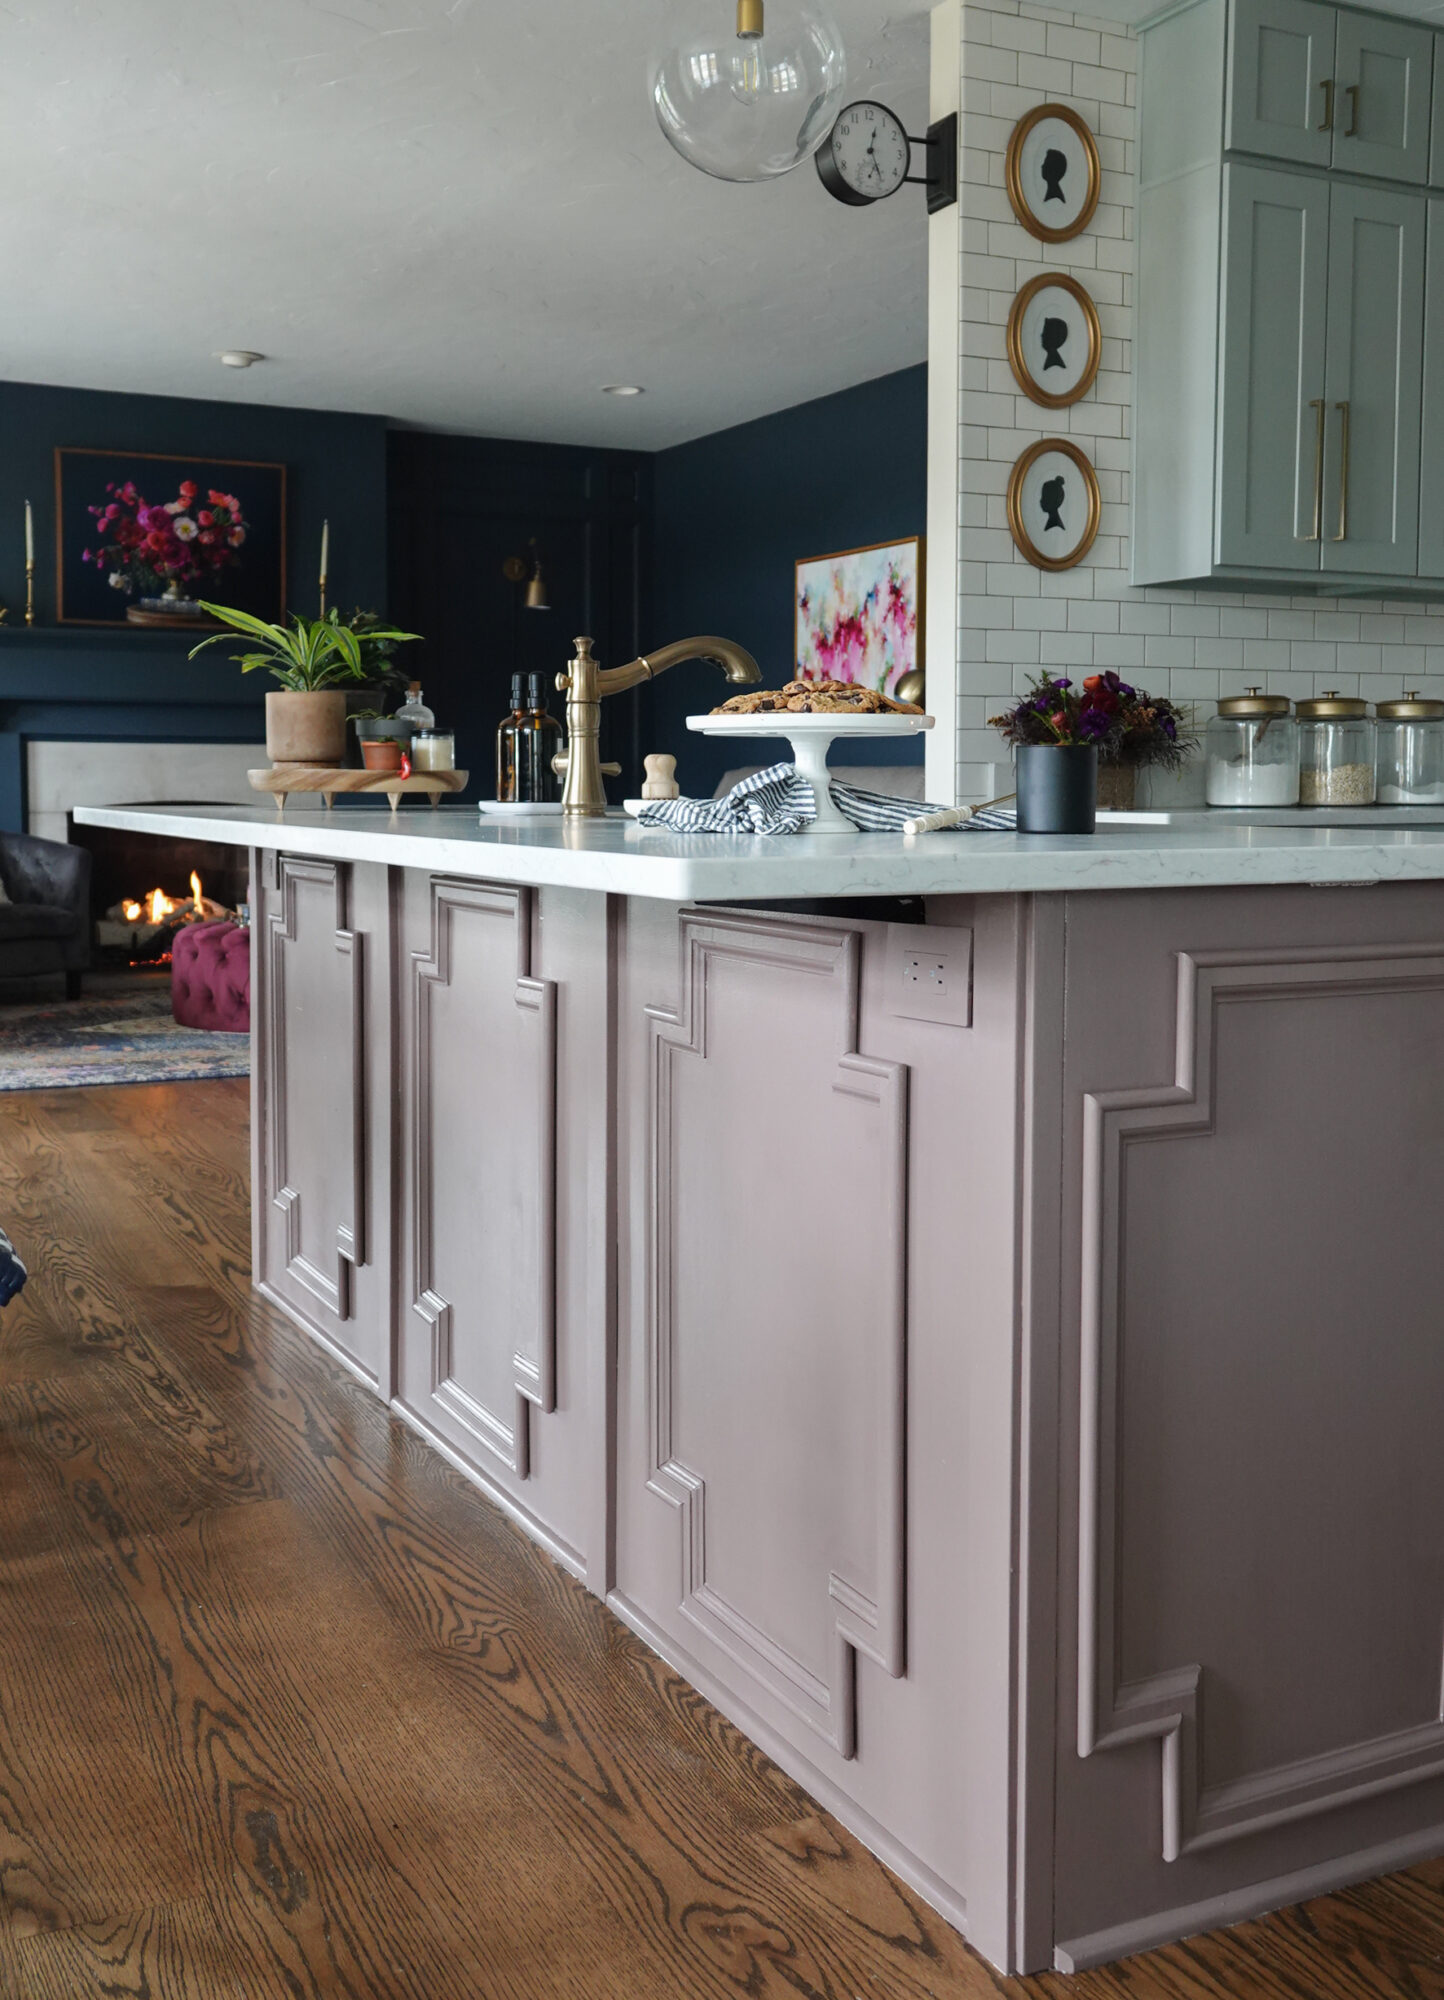
For years I have been wanting to paint the island and add some decorative molding, and it finally happened.
Here is a before photo of the kitchen island:

If you are painting your island a color, I would suggest painting samples and testing the light throughout the day. I had these colored circles in our kitchen for a couple of weeks as I debated the best possible color for the space.

Wanting a unique color that goes well with all the surrounding spaces, I ultimately decided on Cluster Fig by Dutch Boy Paint which is similar to Sherwin Williams Socialite.
How to Add Molding to a Kitchen Island:
I reached out to Woodgrain, and they gifted the molding for my project.
Make a Plan
I scoured the internet and Pinterest for kitchen island molding ideas, but never really found exactly what I was looking for.
By really noticing the shape of the kitchen island and wanting a pattern that made the notch on the sides of the island blend in, this was the result:

In complete transparency, this wasn’t an easy project thanks to the many cuts of my design. However, it IS doable if you are patient.
Having a well-thought-out plan is the key to success. I taped out the plan on my cabinet and was able to get measurements for my project.
Supplies Needed:
Find a Partner
Due to all the cuts on the miter saw, it is helpful to have a partner on this project. I enlisted my dad, and we began the project by cutting the entire shape.

Once we were fairly confident in our measurements (and the piece could be put together correctly), we used the first as a pattern to cut the additional molding pieces.

Beginning at the top, we found the center of both the molding piece and the island section. It is so important to make sure the first piece is level.
Installing the Molding
Start at the top and work your way down. The cuts have to be fairly close to perfect to make this design work in the end.

A nail gun with smaller finish nails will hold the molding in place.
Finish Work
Caulk will be your best friend in this project. It not only helps hide imperfections, but it also helps adhere the molding to the island.

Once the caulk is completely dry, you can paint it (make sure you buy paintable caulk).
Enjoy
The result is a kitchen island that is uniquely yours!


Are you new to my blog? Go HERE to see my home tour and HERE to shop for items I use in our home.