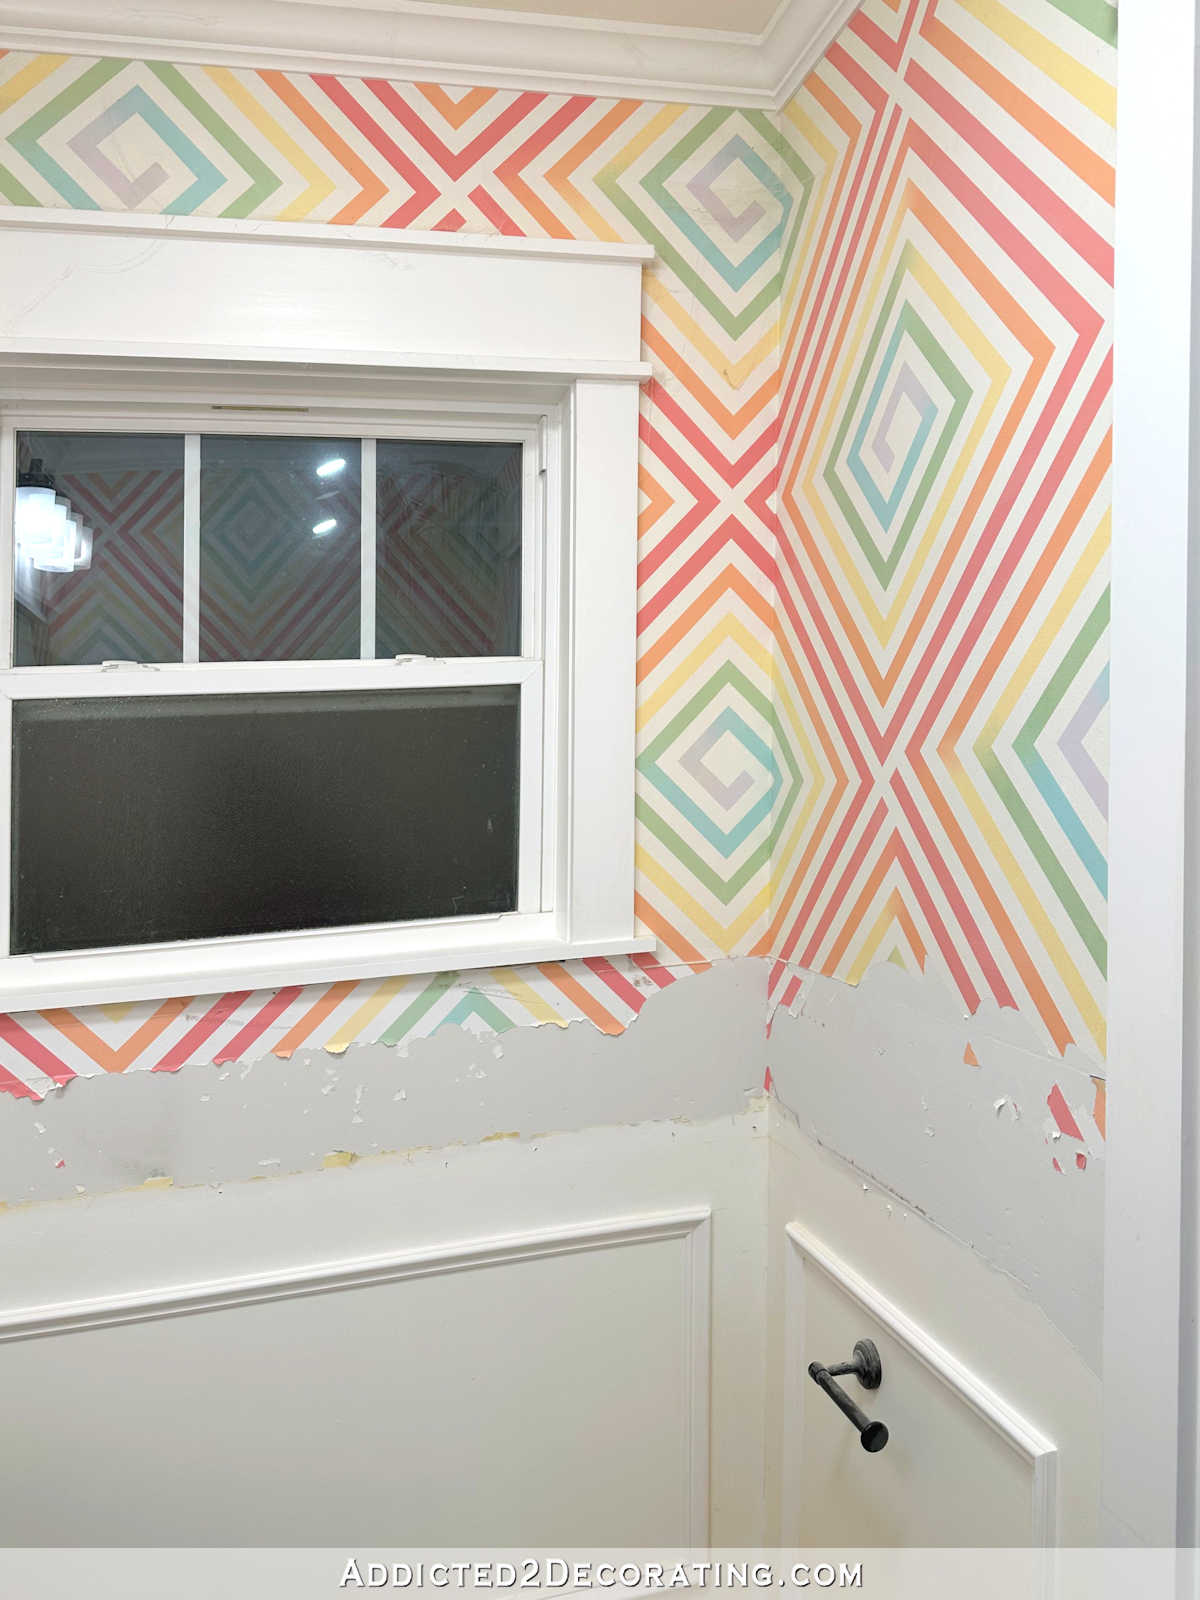
Yesterday, I shared my decision on what I plan to do with the doors in the back entry of the studio. If you missed that, you can read out it here. Since my idea is a little more complicated than just purchasing a quart of paint and painting a few doors, I’m giving myself time to figure out exactly how to go about getting the look I want. So in the meantime, I decided to do a little demolition on the studio half bathroom to get it ready for its new wallpaper.
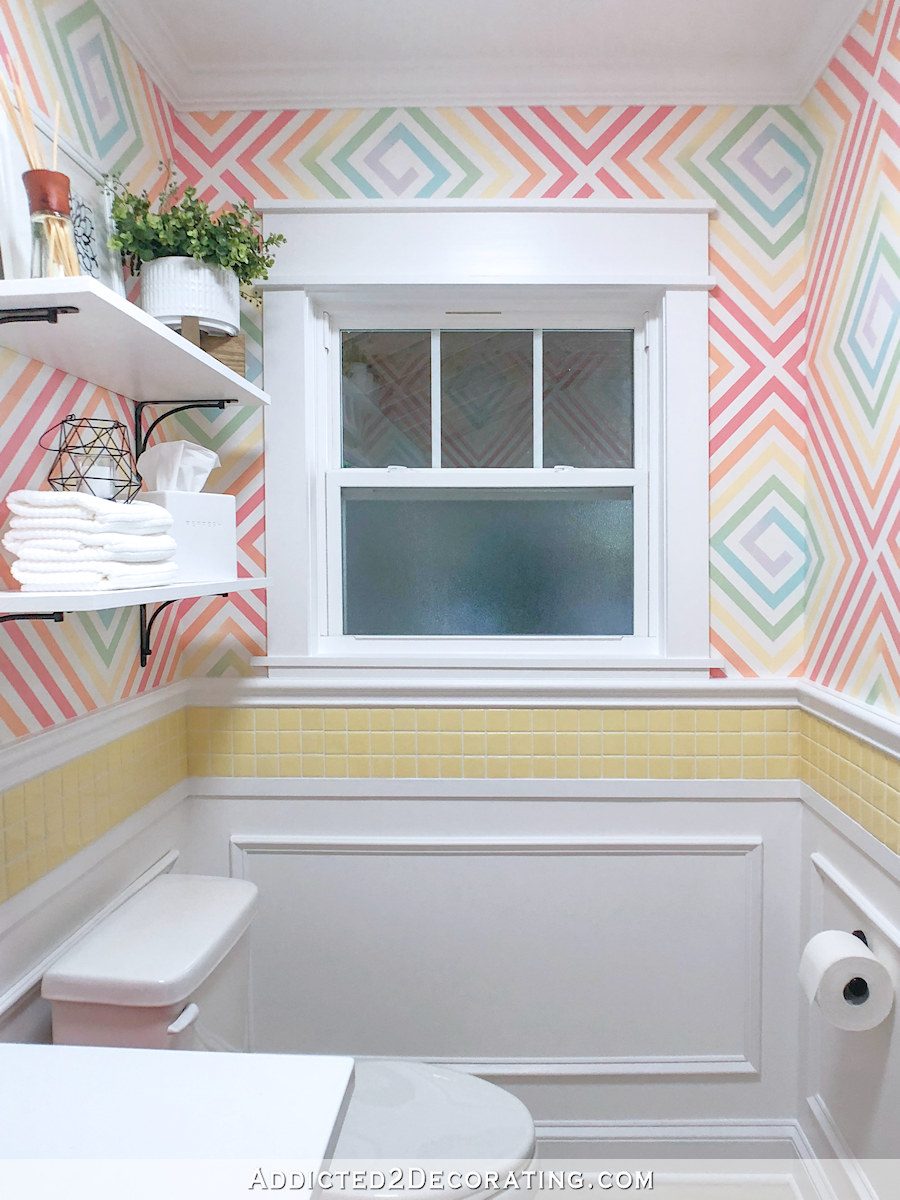
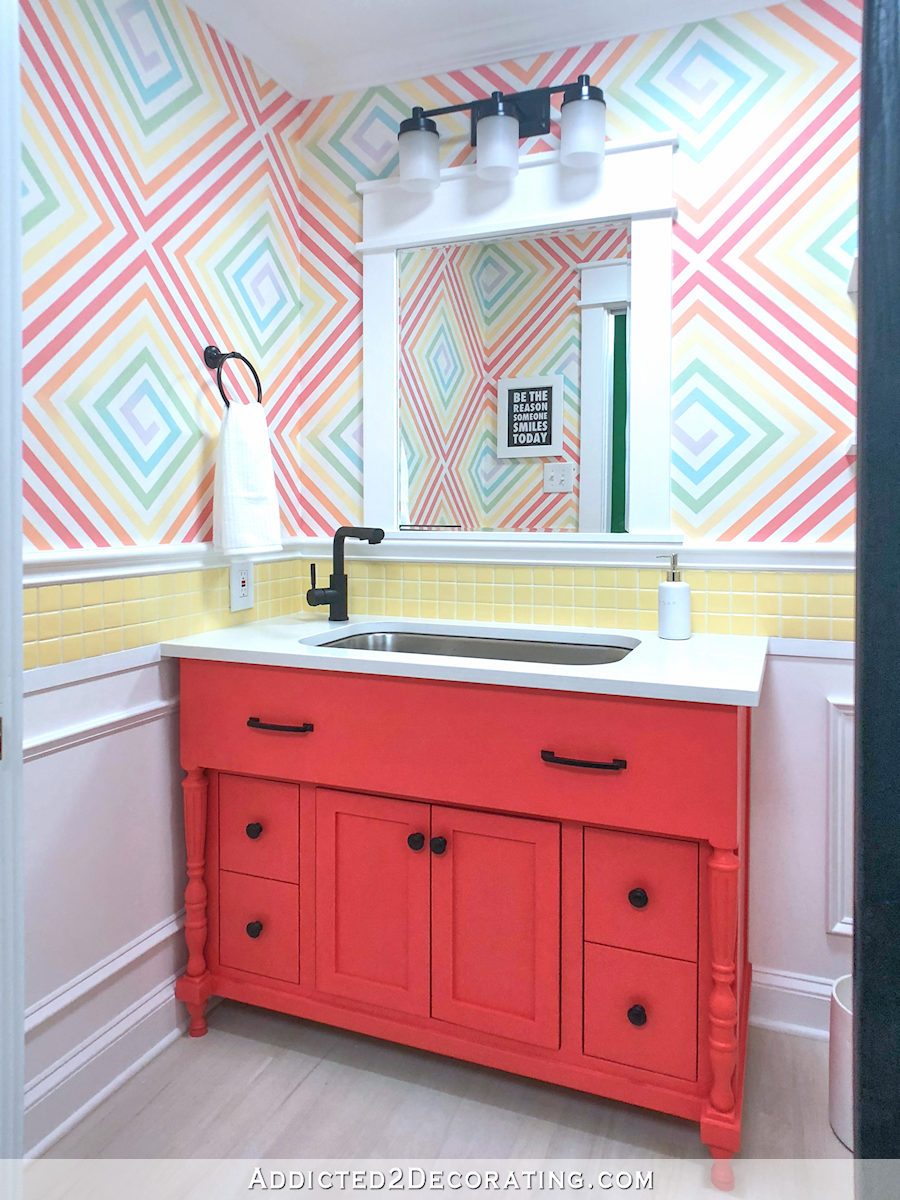
But now I’m in the process of making some changes so that the bathroom will flow better with my new vision for my studio. I’ve already repainted the vanity, painted the floor, and designed a new wallpaper that will go on the walls. That wallpaper looks like this…

So when this is finished, the bathroom will end up being every bit as colorful as it is now, but I think it will coordinate much better with what’s going on in the main part of the studio.
A few weeks ago, I decided to replace the yellow accent tile with a reed-type design using dowel rods. I spent a lot of time removing the yellow tiles in half of the bathroom, and then cutting and sanding pieces of dowel rods and gluing them to the wall.

That was a fun project, and I would love to see it completed, but I decided that it just wasn’t right for this bathroom. So last night, I spend some time popping those off of the wall with a little 5-inch prybar.

I started out using my heat gun to soften the glue before prying them off, but that turned out to be really messy and sticky. I found that there was actually no need to heat the glue before removing the dowels. They popped off the wall quite easily and cleanly without the use of the heat gun.
The same cannot be said for the yellow tiles, though. The half of the room in which I had already taken the yellow tiles off of the walls had three big gouges in the drywall from me prying those tiles off of the wall. I didn’t bother patching them before gluing on the dowels, but now that my plans have changed, and they’ll be covered by nothing but wallpaper or paint, I’ll have to repair them.

So when I started removing the tiles from the other half of the room. I used the heat gun. The tiles had been applied to the wall using Simple Mat adhesive sheets from Home Depot. And let me tell ya, those things are sticky! On the first half of the room, I was using a big prybar and a hammer to get the tiles off of the wall, and those things didn’t want to come off. That’s why I left three big gouges in the drywall.
But using the heat gun to remove them made things so much easier. I was able to get the second half of the tiles (and the sticky sheets) off of the walls with no damage to the drywall.

It did peel off a lot of primer and paint from the drywall, which has left a lot of very uneven areas that will need to be mudded over and sanded smooth before I can move on with paint and wallpaper, but that’s pretty simple.

Now that I’ve decided to remove the accent and chair rail, I’ll be able to have a full apron on the window trim. Because the chair rail came up so high, I’ve had this tiny little 1-inch apron sandwiched between the window sill and the chair rail all these years. That’s one of those things that really irritated me, but I didn’t really have any other choice if I wanted a chair rail.
But now that the chair rail is gone, there will be plenty of room for a full apron. It’ll look so much better!

The trim around the mirror, which was done exactly like the window and door trim, was also missing an apron.
Even though there will be plenty of room for an apron now, I’ve decided to remove it completely and find a nice framed mirror to use in this room instead.
When I did this bathroom (and the hallway bathroom) years ago, I loved the idea of framing out the mirrors to match the windows and doors. But I’m ready to move past that look now. I want to keep the window and door trim on the windows and doors, and then take the opportunity to bring in a little extra something with the mirrors.

Unfortunately, I glued this mirror directly to the wall, so I’m sure getting it off will cause some damage that will need repair.

So things in this bathroom look like a complete mess right now, but it has to get worse before it gets better. I’m very glad it’s a tiny bathroom, so even though the walls will need some repair before I can wallpaper, at least I don’t have a lot of area to cover. I’m just really excited to finally get the wallpaper on the walls! I’ve had the wallpaper for weeks, and I’m ready to see some progress on it.


Addicted 2 Decorating is where I share my DIY and decorating journey as I remodel and decorate the 1948 fixer upper that my husband, Matt, and I bought in 2013. Matt has M.S. and is unable to do physical work, so I do the majority of the work on the house by myself. You can learn more about me here.