Disclaimer: This blog post is sponsored by RTA Outdoor Living. Thanks for supporting the brands that support this blog.
We’re adding an outdoor kitchen to our backyard! See the appliances we chose for the new space and how we designed it for function and style.

Ever since we added a pergola to our backyard, we’ve been using our outdoor space more than ever. We have our dining area with our large outdoor table on the main patio area. We have our lounge area under the pergola with our outdoor TV. The kids have their cute new playhouse. What more could we need?

Well, this just in…we are getting an outdoor kitchen!
How It All Came To Be

Over the summer, RTA Outdoor Living reached out asking if I wanted to chat about featuring their products in our backyard space. They’re a Midwest-based business that specializes in custom outdoor kitchens that you personalize to your space. The custom kitchens are built off-site, delivered, and installed in your home. The entire process is fast – only 4-6 weeks for them to build the entire thing!
At first, I wasn’t sure if it would be a great fit. I thought custom outdoor kitchens were only for ginormous homes with huge backyards. We live in a modest city space. Could we have a cool new outdoor kitchen in our outdoor area?
I floated the idea to Finn, the chef of the household, and he freaked out. He was so excited and immediately ran to the backyard, tape measure in hand, to figure out how we could make it work with our available space.
Our Peninsula Problem

Ever since we renovated our backyard, we’ve struggled with this “peninsula” area. The tree that was planted here (Japanese Tree Lilac) was looking pretty rough right from the start. It wasn’t planted deep enough and after having a few landscapers out, they also noticed that it was diseased. We knew that we would have to remove it eventually, but we didn’t have a game plan for what we wanted to put in its place.
We realized that if we removed the tree, we might actually have enough space for an outdoor kitchen. And not just any outdoor kitchen, but a pretty big one!
Outdoor Kitchen Layout Options

Finn and I spent many evenings discussing what we might want to put in our hypothetical outdoor kitchen. Finn is the cook in our household and 90% of our meals involve grilling. I swear, his grilled salmon is better than any restaurant! So, obviously, our new space would include a grill.
We’ve also really fallen in love with hosting. We adore our neighbors and we love having everyone over for cocktails on Friday nights, while the kids play and enjoy a movie night under the pergola. If there was room, we wanted to incorporate an outdoor refrigerator for beverages, along with bar seating. That way, it could feel like an outdoor bar for our guests!
Going With A U-Shaped Layout

We considered a galley kitchen, l-shaped kitchen, and other layout shapes. But after playing around with the measurements, we decided that a U-shaped layout would work best for our space. This would include a shorter island connected to two longer islands – resulting in the shape of the letter “U.”
This offers plenty of room for food preparation, cooking, and hosting! Not to mention lots of counter space and storage space.
Using The RTA Outdoor Living Design Tool

Once we had a good idea of the layout, we started playing around with the design tool on RTA Outdoor Living’s website. Wow, this thing is fun to use! You choose your layout, size, appliances, countertops, and finishes. This is incredibly helpful because you can easily move things around and play with the appliance placement as you go.
It’s nice to visualize the exact setup and flow for your final space. We spent a lot of time reviewing this floor plan and tweaking things until Finn was pleased with the amount of space for his cooking area and I was thrilled with the flow for future large gatherings. Even if you’re not working on an outdoor kitchen right now, it sure is fun to play with this design tool! This article walks you through the best tips to use it.
Choosing Outdoor Appliances

RTA partners with Coyote Outdoor Living for all of its appliances. Their products truly are the best of the best. Plus, they have everything you could need for a kitchen setup, including grills, outdoor refrigerators, sinks, smokers, and even pizza ovens! We looked through all of the options (so many to peruse right here!) and decided to go with these items for our space…
With all of these incredible appliances, Finn may be doing more outdoor cooking than indoor cooking! In fact, Coyote even has a YouTube series showcasing some incredible recipes. I’m sending these videos to Finn for grilling inspiration.
The only thing we didn’t choose to add was an outdoor kitchen sink. We didn’t quite have the space and we figured we would be just fine without one.
Our Custom Outdoor Kitchen Design (Dimensions)

Once we narrowed down our selections, we passed the information over to the RTA team. I then worked with one of their talented designers to review the custom design and draw up a blueprint. Here’s a look at our outdoor kitchen plans and the sizing.

You’ll notice we have the built-in grill on the short side, the bar area on the front, and then the long countertop will be Finn’s prep area near the side fence. It will also have outdoor kitchen cabinets, another refrigerator, and a drop-in cooler on the top. We are going to have plenty of storage with this thing!

There should also be enough open space in the middle for easy access to the fridges even when Finn is grilling away.

For the finishes, I chose a white reclaimed brick for the base and the thunder-white granite countertop. Everything is durable and specially designed for outdoor use, so it should easily withstand the harsh elements and Chicago weather conditions. This fact blew my mind!
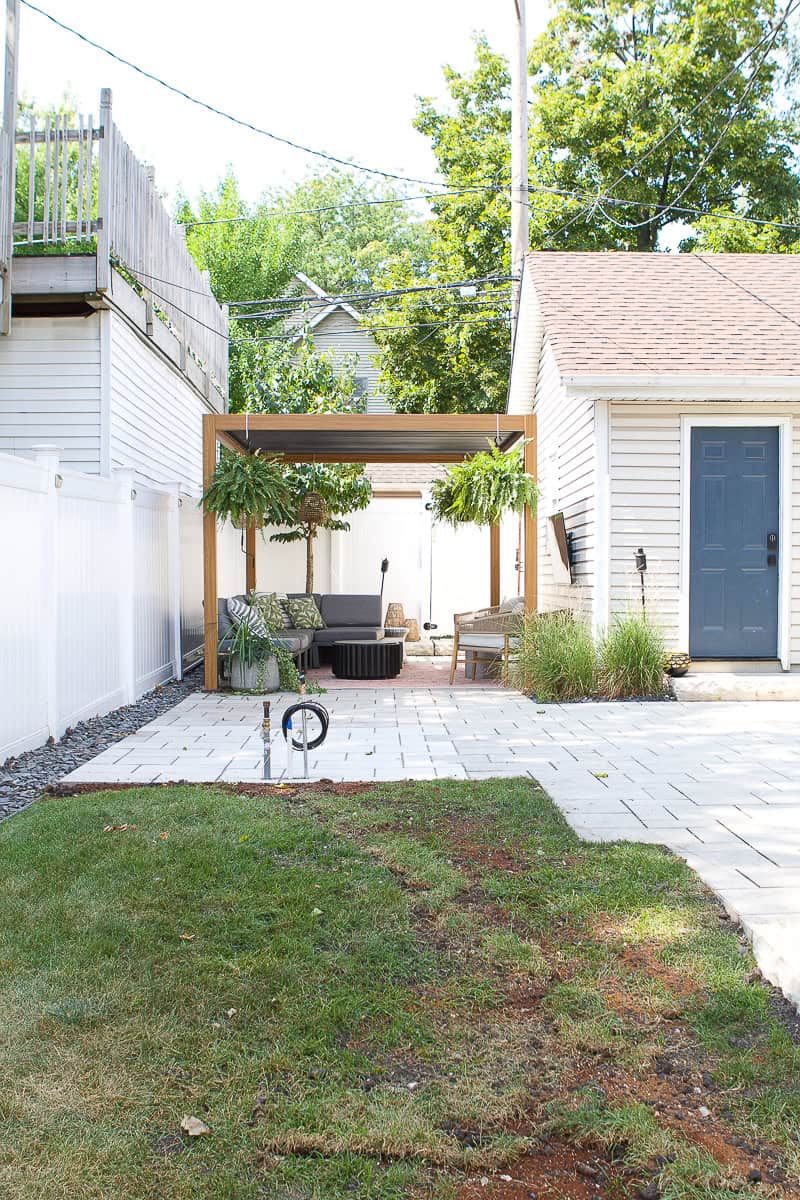
Prepping The Space
Once we signed off on the blueprints, they immediately started building the kitchen. And since that process only takes 4-6 weeks, I had to get my butt into gear to get our backyard ready for the new kitchen.

I called my go-to contractor and he got a team to prep our backyard. We had to rip out the diseased tree and remove the bushes and plants. (Don’t worry, we saved them and replanted them elsewhere in the yard!)

They then had to run electric and gas lines from our home, underneath the grass, to the new kitchen space. That was a pretty big process, but they did a great job getting it all ready.

Our grass is still recovering, but I’m hopeful it won’t be a muddy mess for long!

The final step was adding new pavers where the landscaping was located. I was able to find the exact pavers we had installed three years ago (the color is “greyed nickel”) and had a pallet of those delivered. They installed them in a day and used polymeric sand for the finishing touch.

You’ll notice that the new pavers look much lighter than the old, but they’re the same kind. It’s just the old ones have weathered a bit over three years. The new ones will mostly be covered by the kitchen, so I’m not too worried about the final look.
Once the space was cleared out, I realized we do have ample space for a kitchen here. I never envisioned it before, but I can certainly envision it now!
Delivery & Installation Plan
With the space prepped, we’re now waiting for the kitchen to be delivered. They will deliver it in huge pallets to our garage and then the install team will get it all in place over 1-2 days. RTA has a pro installer network, so they were able to quickly find someone in our area that I hired for the installation. It’s not exactly a DIY job (The pieces are incredibly heavy!), so I’m relieved that pros will be doing this step.
What About The Kids’ Playhouse?

I almost forgot to address where the heck the kids’ playhouse is going to go. Good question. For now, we put it in the grassy area, although we know long-term that it will kill the grass. Long-term we want to rework what we have up on our deck. Right now, we have our grill but we will not need it anymore! We may end up putting the house up on our deck, but we will see.

Just know that it’s not going anywhere! I put too much love into this playhouse to only have it for a few months!
What’s Next?
This custom kitchen will be the perfect solution for our awkward peninsula. I’ll be sharing sneak peeks of the delivery and installation over on Instagram stories, so be sure to tune in there. Then, I’ll be back with the big before and after of this space. My final blog post will cover the cost of this entire project (especially how it compares to the cost of an indoor kitchen) because I’m sure you’re interested in that information!
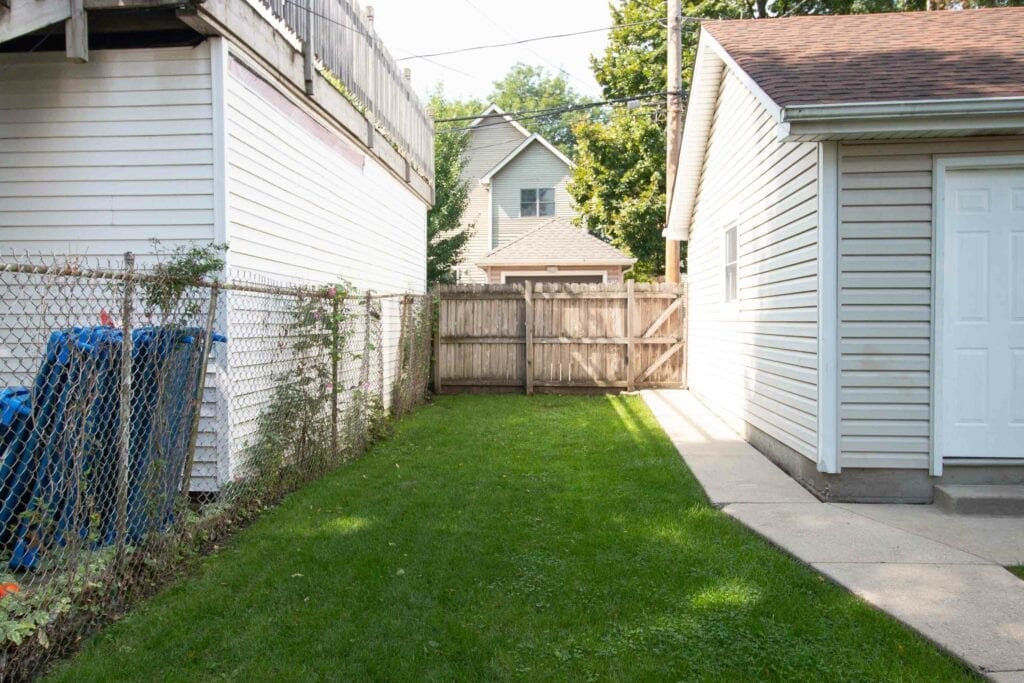
It’s exciting to see how much we’ve maximized our outdoor living space since moving to this home. Just take a look at what this space looked like when we bought our home!
I’m thrilled about this outdoor kitchen project and can’t wait to see it come to life!