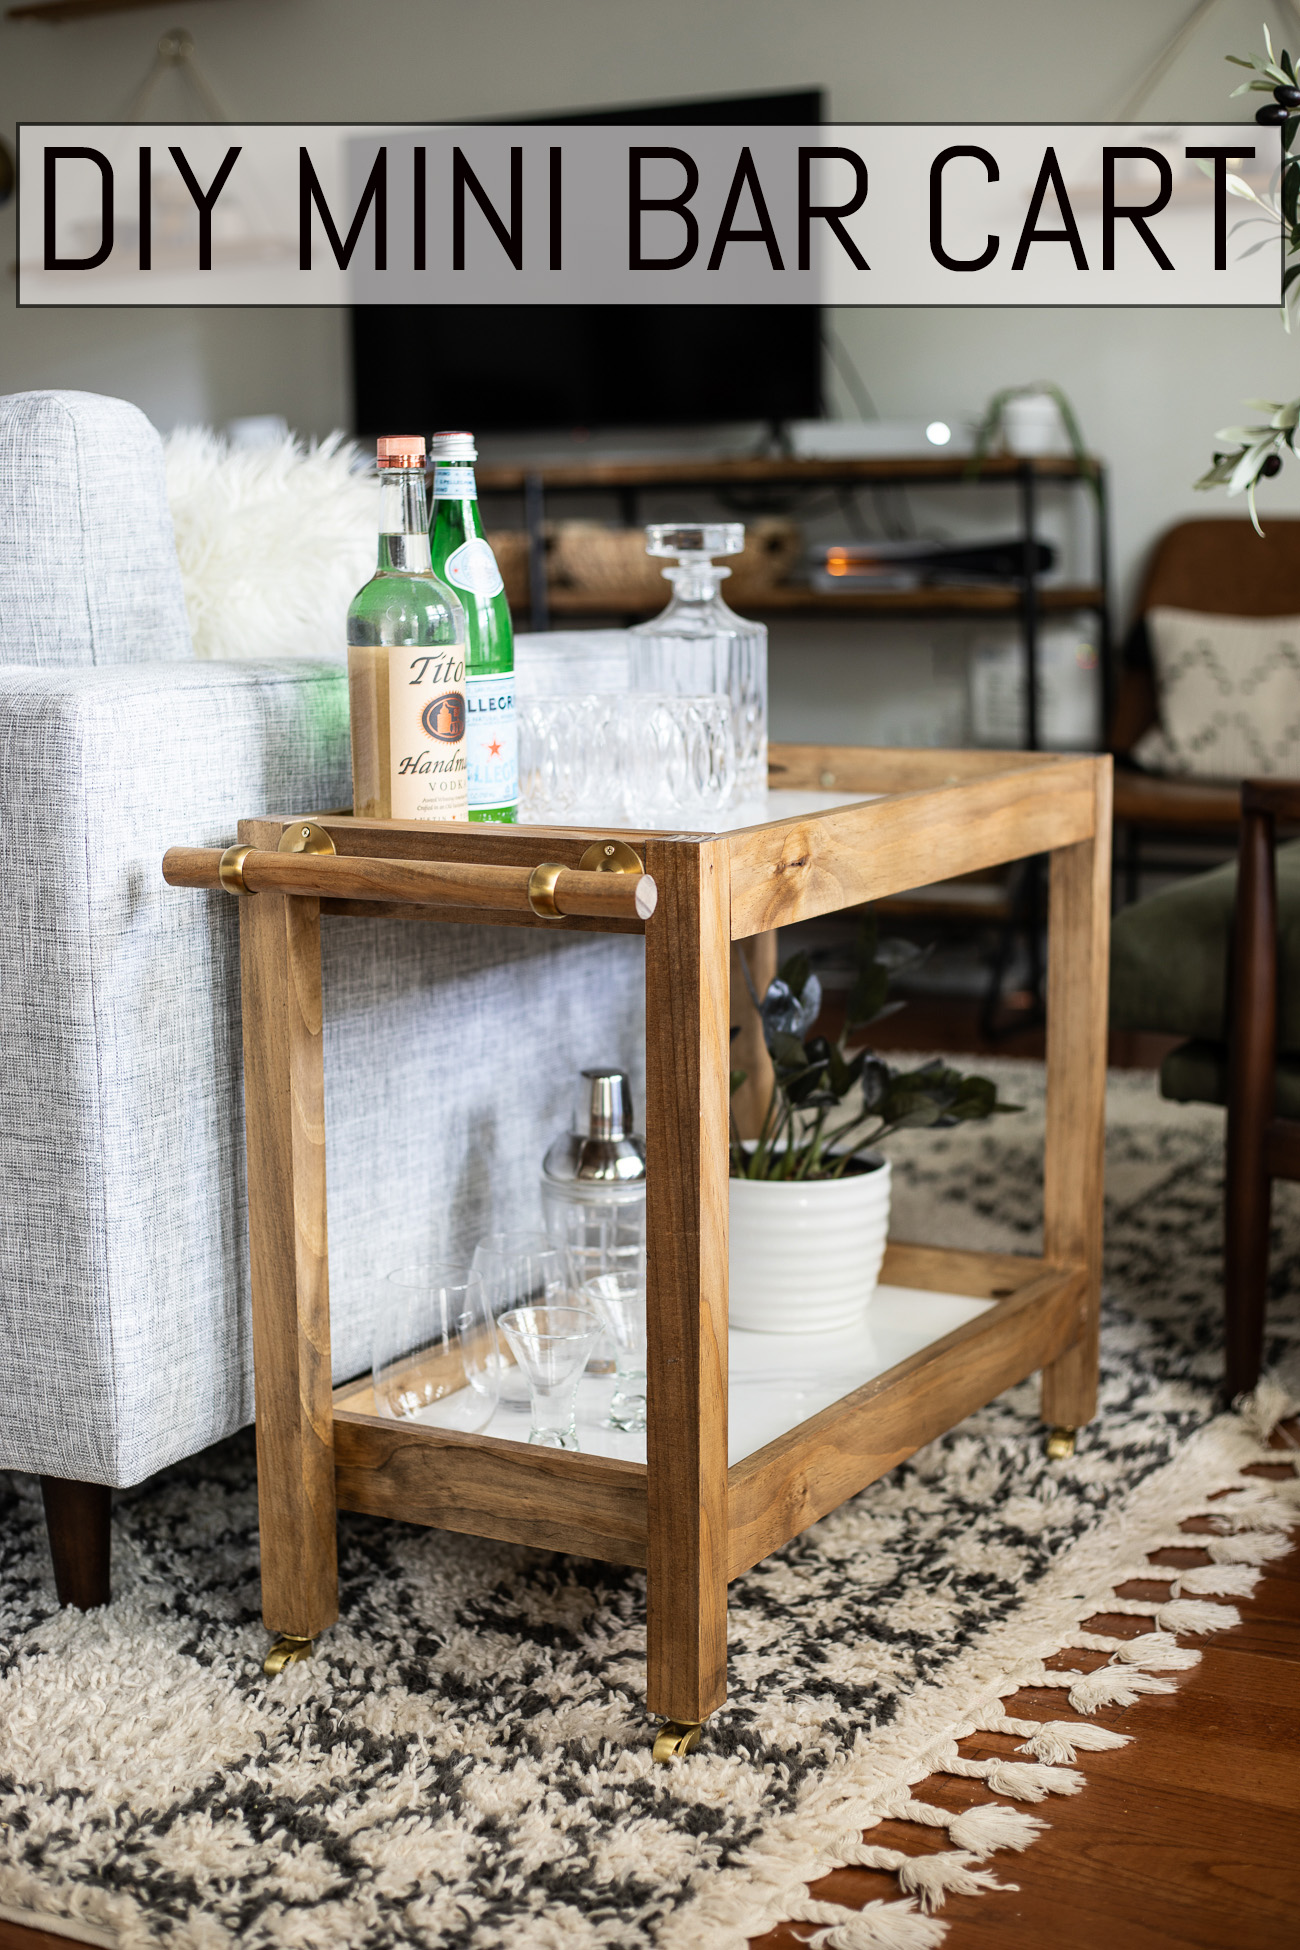
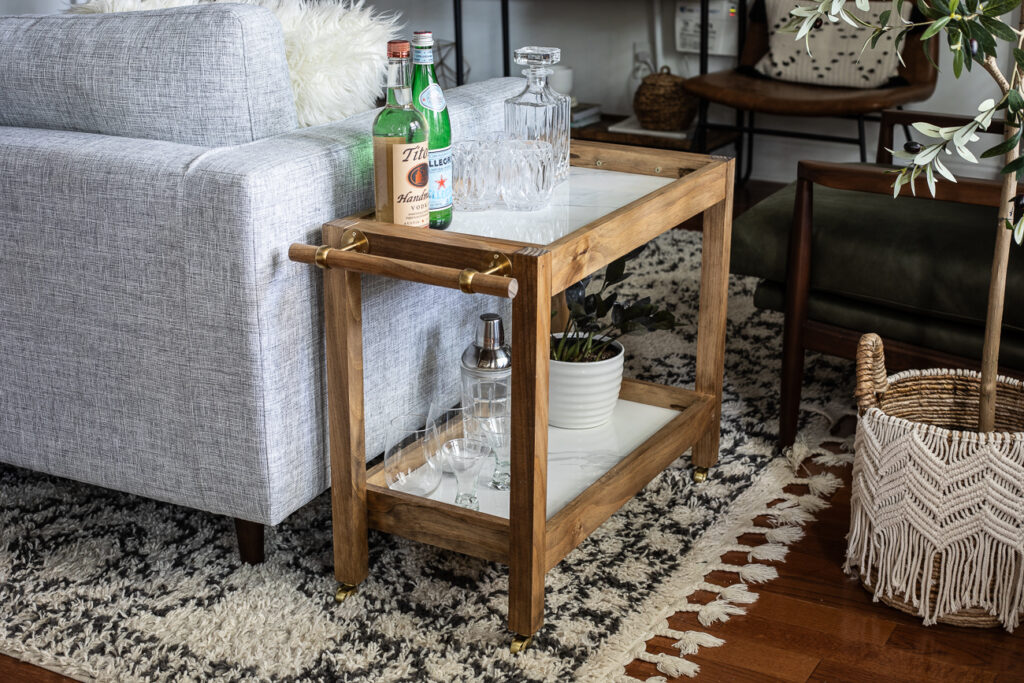
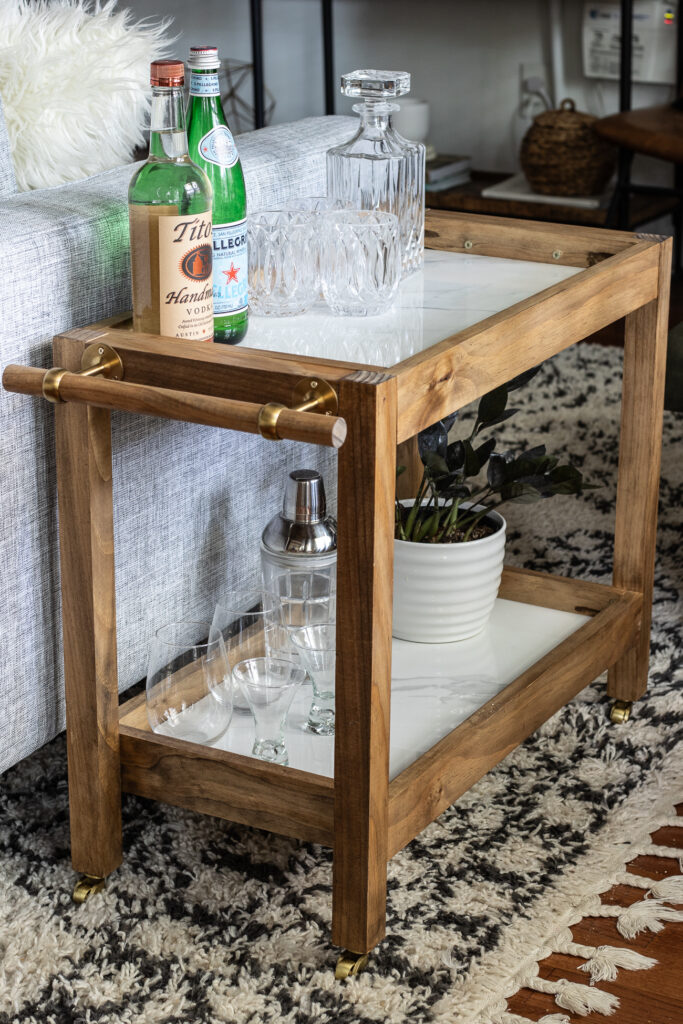
I had so much fun working on today’s project. I’m going to show you how I built this DIY mini bar cart! I built a bar cart a while back (here) and I love it, but I wanted to modify that design to create a smaller version that can double as a side table, plus I added some marble tiles because I love the wood and marble combo.

What You’ll Need:
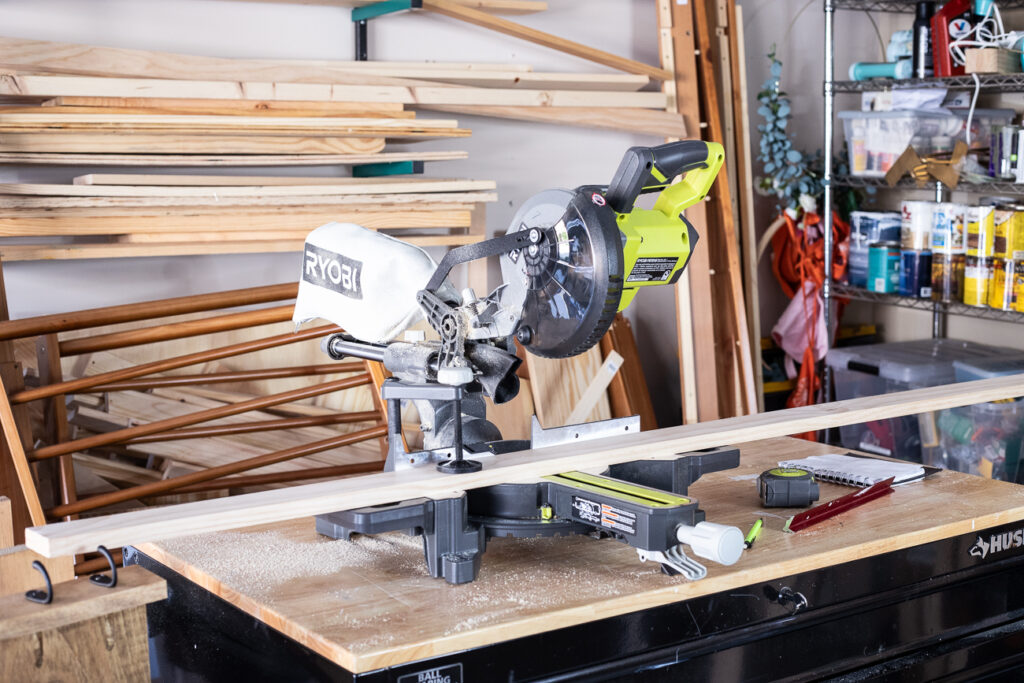
Step 1: Cut Your Wood
I used a miter saw to cut my 1×3 and 2×2 boards and dowel rod to the dimensions specified above. I used a circular saw attached to a Kreg Rip Cut to cut my project panels. I customized the size of this cart to accommodate 12″x24″ tiles, but you could modify the design to suit your needs or omit the tiles altogether.
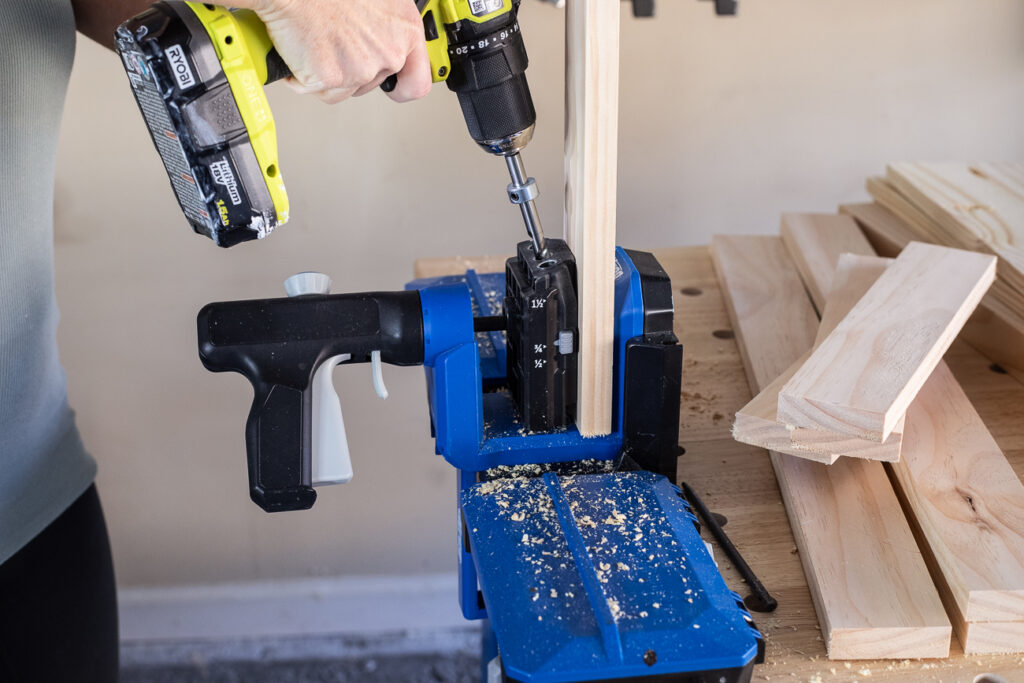
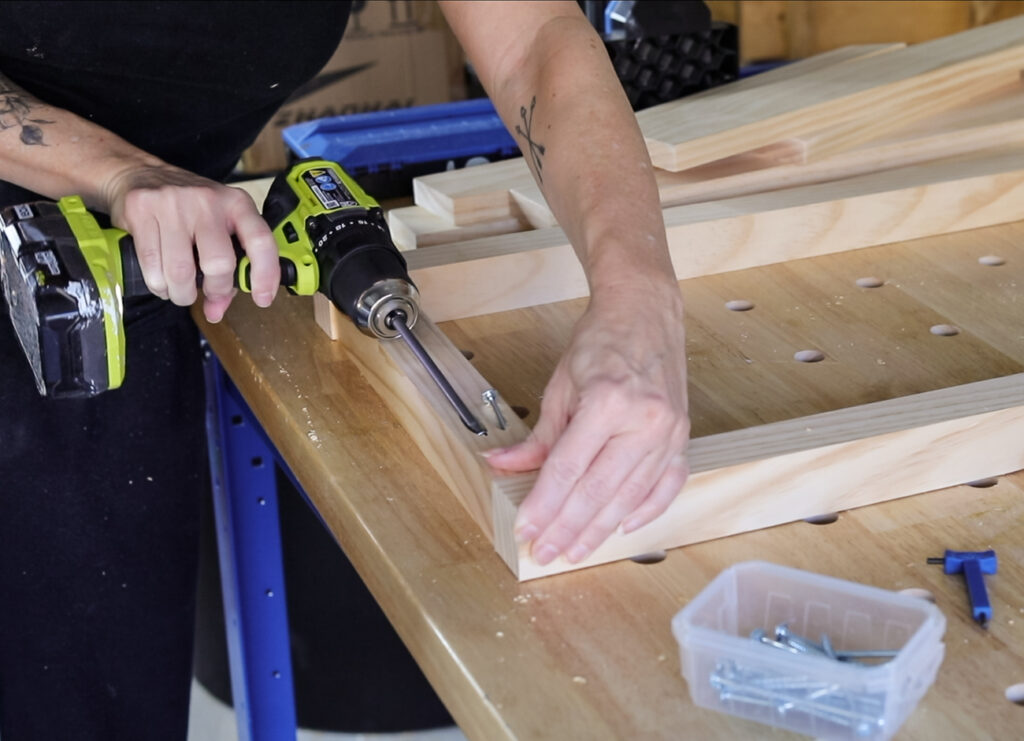
Step 2: Drill Pocket Holes
Using the Kreg Jig 520PRO, I drilled pocket holes as follows:
3 pocket holes along each long side of my project panels; 2 pocket holes along each short end of my project panels; 2 pocket holes at each end if my 10 1/2″ 2×2 boards; 2 pocket holes at each short end of my 12″ long 1×3 boards. Be sure to adjust the pocket hole jig and the collar on the drill bit according to the thickness of the wood you’re working with.
Step 3: Sand
I used a random orbit sander to sand everything smooth.
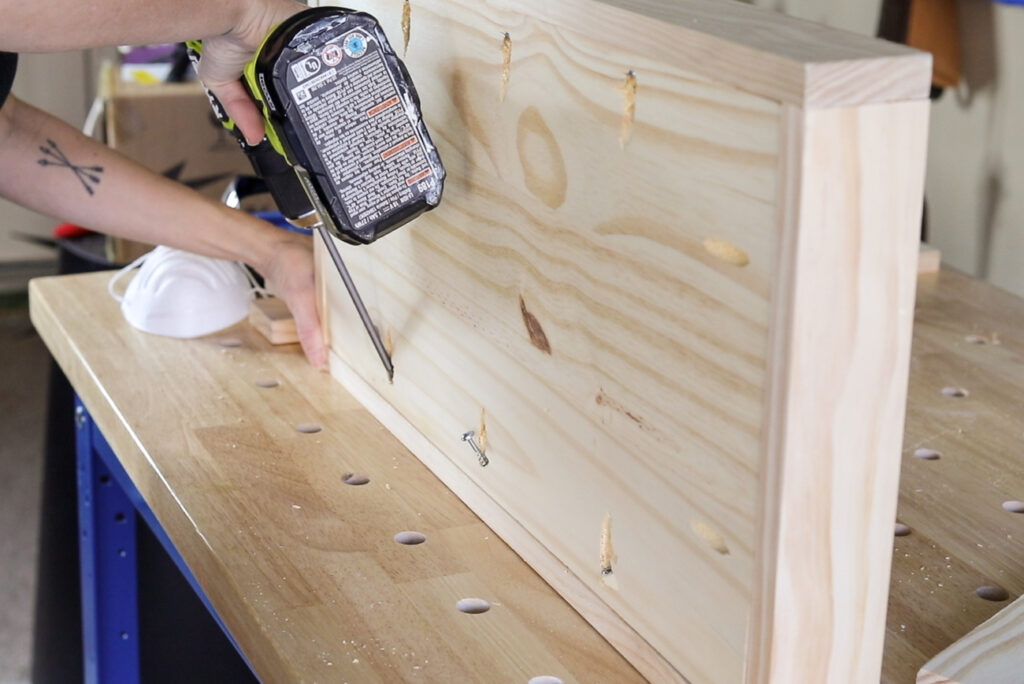
Step 4: Assemble Shelves
Attach 12″ long 1×3 boards (ends) and 25 1/4″ long 1×3 boards (sides) to your 2 project panels using 1 1/4″ pocket hole screws.
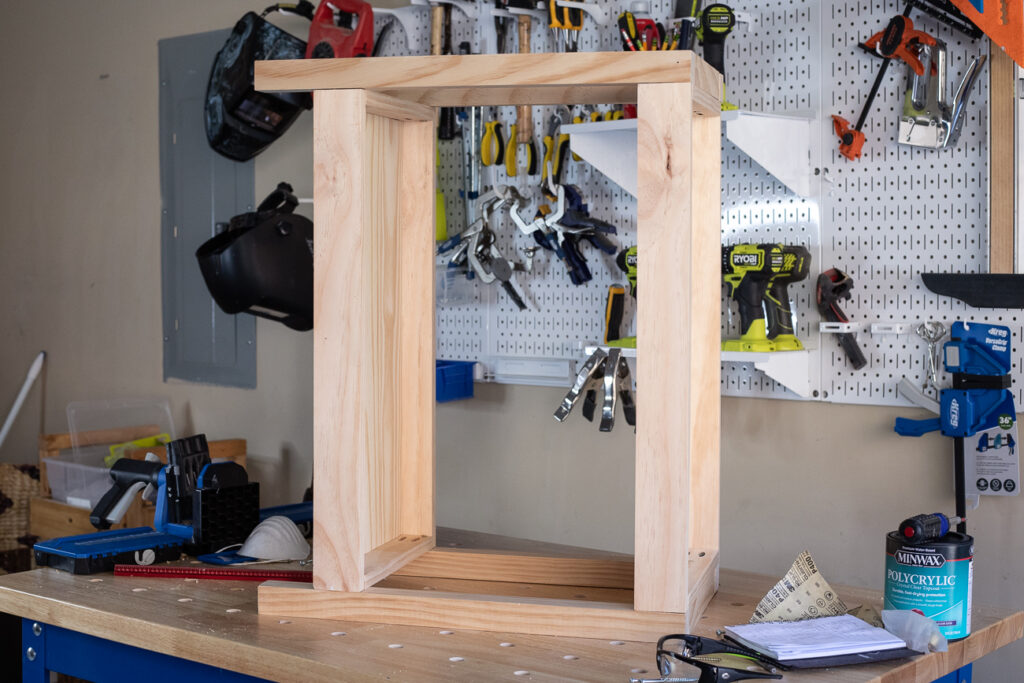
Step 5: Add Legs
Assemble legs by attaching each 10 1/2″ long 2×2 board to two of the 22″ long 2×2 boards, creating two separate “U” shapes. Then attach each set of legs to the sides of the shelves using 2″ long wood screws. I lined up the top shelf with the top of the “U” shaped set of legs, then for the bottom shelf I attached it about 3 1/4″ from the bottom of the legs. I found it easiest to assemble while laying on its side.
Step 6: Stain or Paint
I used an Early American stain and then added a polycrylic topcoat in a satin finish.
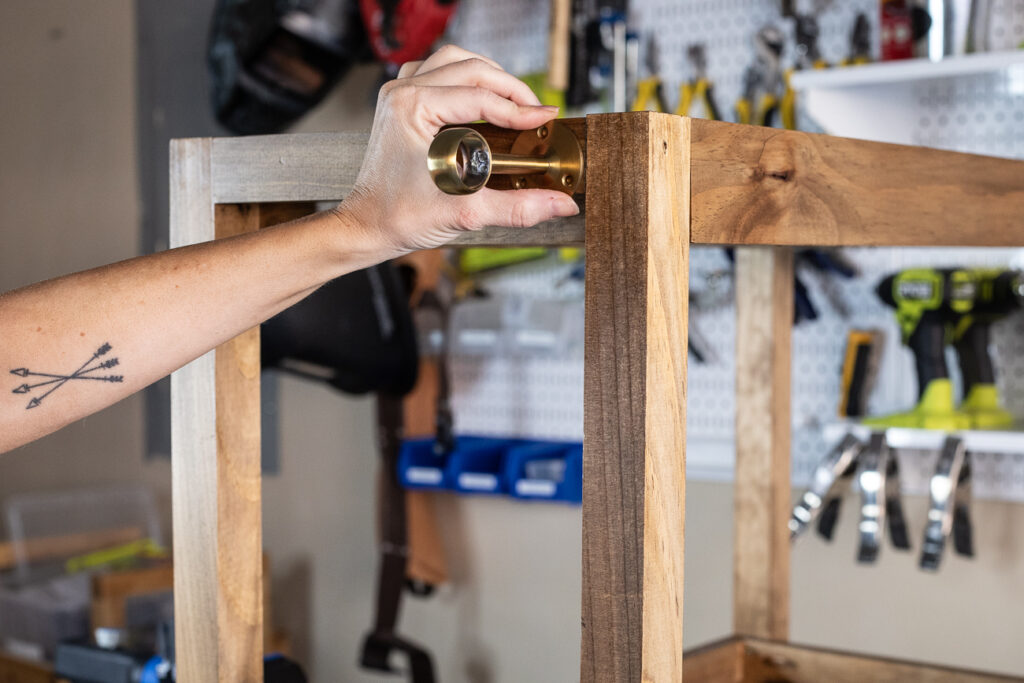
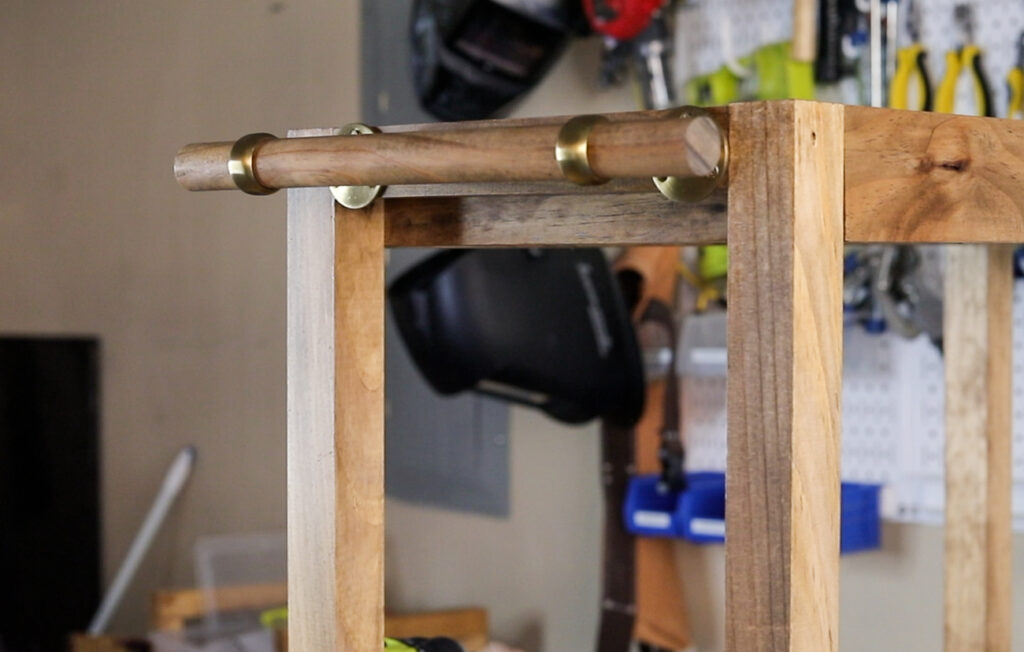
Step 7: Add Handle and Casters
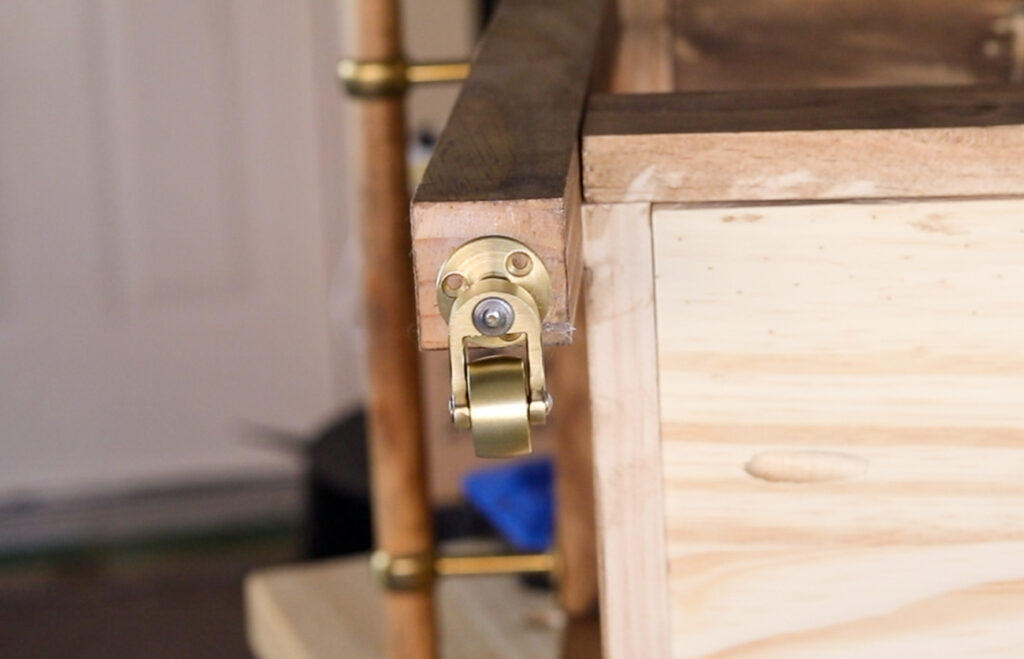
I added two 1″ curtain rod brackets, lining them up where the 10 1/2″ long 2×2 board meets the 22″ long 2×2 board at the top of each side of the cart. Then I slid the dowel rod through, creating a handle. Next, I added gold casters centered on the bottom of each leg.
Step 8: Add Marble Tiles
For the last step, I inserted my 12×24 ceramic (but marble look) tiles. You can adhere them with construction adhesive if you choose to, but I just placed them in so they can be removed if I ever want to take them out.

Be sure to head over to my YouTube channel to check out the full video tutorial!
You Might Also Like: