
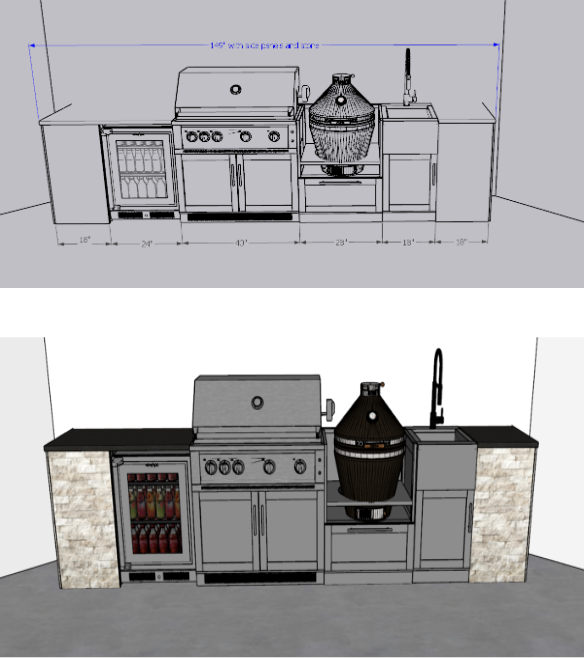
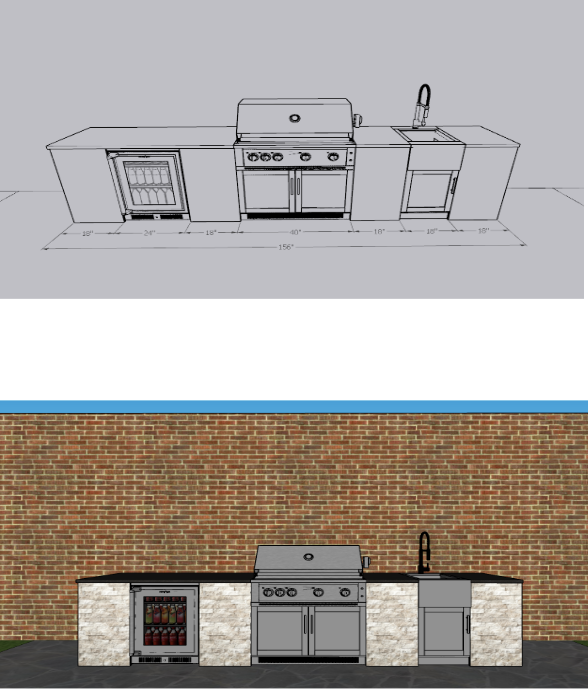
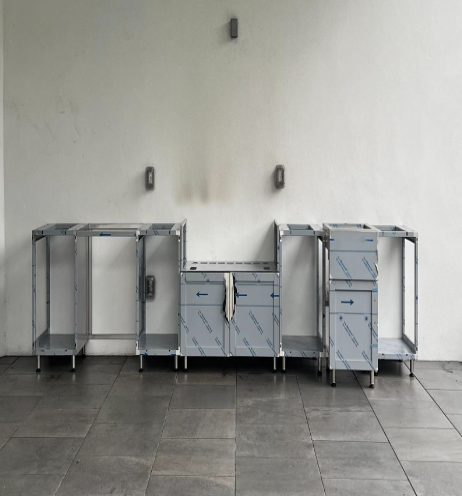
Mock-ups and Design
I began my outdoor kitchen project with New Age by crafting my ideal outdoor kitchen design. The process starts with a virtual consultation on Zoom, where they present all the available materials, designs, and additional features. Afterward, you send them a photo of your space, and they create mock-ups based on your preferences. You can then review these designs and decide if they match your vision. If everything looks good, they’ll ship the product directly to your home, which is very convenient. We chose stainless steel frames over wood due to Florida’s challenging weather conditions. Swipe to see some of the designs and mock-ups that inspired me!
Building Metal Frames
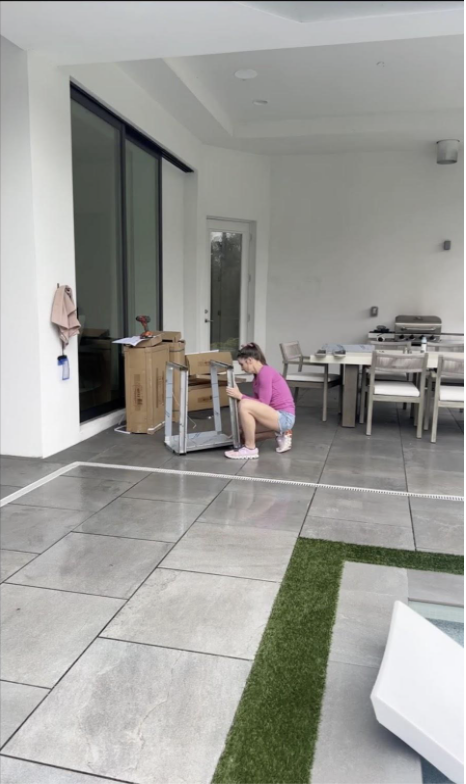
Upon receiving the product, the initial step was to assemble the metal frames for the cabinets. Each section came with detailed instructions. I carefully followed these instructions, ensuring that each piece was securely fastened and aligned correctly. The frames were the foundation of the entire structure, so it was crucial to get this part right.
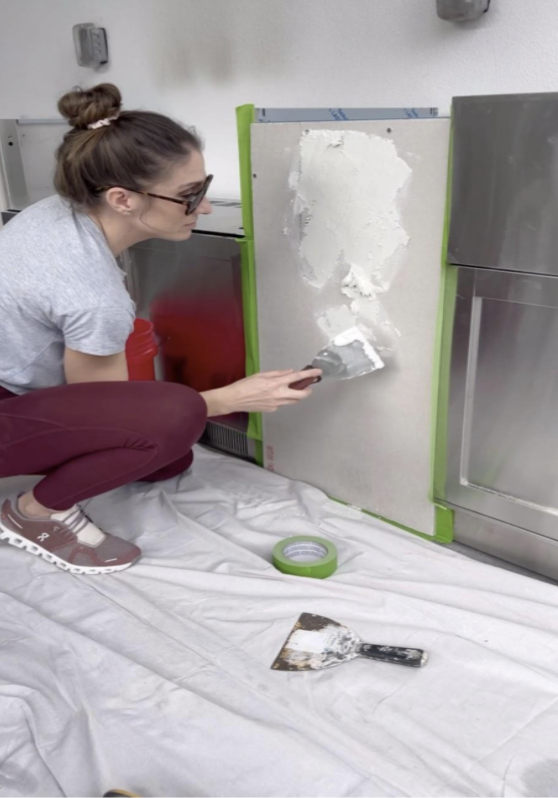
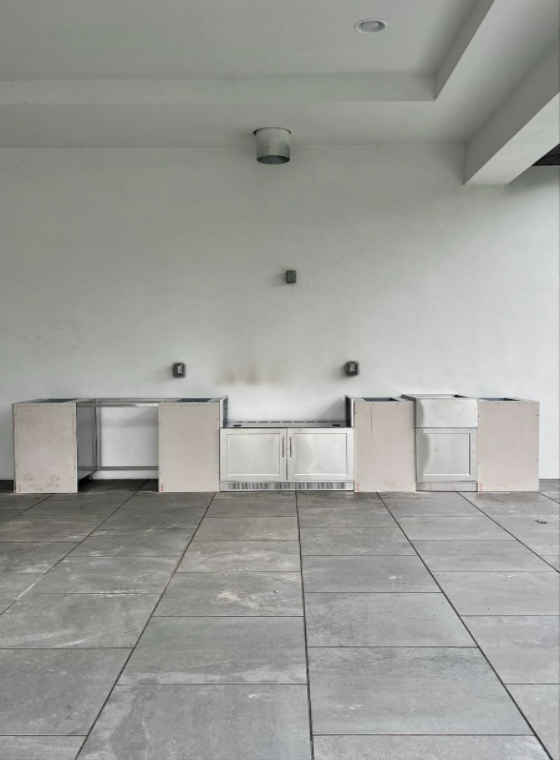
Cement Boards and Stucco
Once the framing was completed, it was time to attach cement boards to the front of each section. This step isn’t only about adding sturdiness; it’s meant to provide a surface for stone, brick, or stucco to adhere to the metal cabinets. Then came the tricky part: applying the stucco. I turned to YouTube for guidance, but my first attempt didn’t go as planned—the stucco dried too quickly and hardened, making it difficult to smooth out. The next day, after watching a few more videos, I figured out a solution. I sprayed the cement with water and added a bonding agent to the stucco mix. It worked! After a few coats and some sanding, the surface started to smooth out.
I ended up using a white stucco from Ace Hardware because almost all stucco is grey and you must wait 30 days to paint it. I couldn’t wait 30 days so I searched high and low to find a white stucco so I could get it done on my schedule!
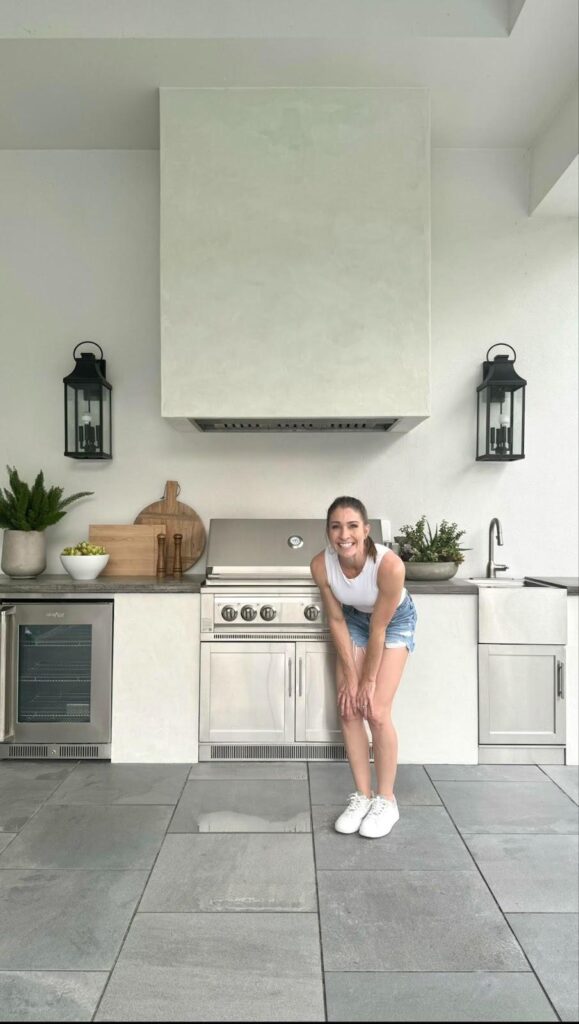
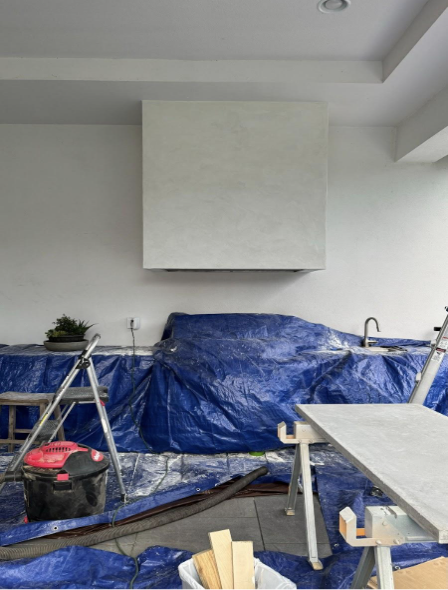
Building The Vent Hood and More Stucco
Next, I tackled the construction of a vent hood. I had to first build a structure to attach the hood to the wall. Using treated 2x4s from Home Depot, I crafted a wooden frame. The challenge was figuring out how to create a curved vent pipe, so I purchased a vent pipe from Lowe’s and made the necessary adjustments.
It was prevented through the roof, hvac would need to install if you don’t have one.
Once the frame was ready, I covered it with cement boards. This time, the process was easier since I had already learned how to mix the stucco properly from my earlier experience with the metal frames. I applied multiple coats of stucco, sanding each layer to achieve a smooth, fluffy, cloud-like texture, which helped eliminate any ridges and bumps. I’m really proud that I managed to do it all myself without needing to hire outside help!

To watch the final outdoor kitchen reveal click here!
To shop my outdoor patio, simply click the links below!
FAQs: Outdoor Kitchen Edition
Q: Where did you get the design/renderings for the Kitchen?
A: New Age Products helped me design and pick out the best layout for my space! They deliver to your house, and they are fantastic! New Age Website.
Q: What stucco did you use?
A: Countertop Mix by Quikrete, Linked here!
Q: Why metal frames?
A: Metal frames withstand Florida weather better.
Q: Why pressure-treated lumber for hood vents instead of regular ones?
A: I chose pressure-treated wood because it’s meant for outdoor use and can withstand the weather.
Q: Did you sand between coats of stucco?
A: Yes immediately after, it dried very fast.
Q: How did you attach the 2X4 wood framing to the wall?
A: I used a masonry drill bit, to drill through the stucco, and fastened with tapcon screws.
Q: How did you cut the concrete cement boards?
A: I used my circular saw with a diamond blade saw. Linked Here!
Q: What consistency should the stucco be?
A: Pancake Batter.