Sponsored by Kreg Tool
This post is sponsored by the amazing Kreg Tool Company—and it’s a perfect fit. I used my Kreg pocket hole jig, screws, hardware jig, concealed hinge jig and shelf pin jig, cutting guides throughout this build, and it made the process fast, strong, and beginner-friendly, and the end result so professional looking!
Why I Built this Project
We bulk shop for toilet paper. It’s been stored in our pantry, but that takes up a lot of valuable space in our pantry. I have a spot behind the door of my powder room that would be perfect for storing toilet paper. But I wanted something that looks nice and is sturdy and will hold up for a long time. So I decided to build my own bathroom storage cabinet.

Why You’ll Love This Bathroom Cabinet
-
Lots of storage – The lower cabinet is deep and spacious—perfect for those bulky bathroom items, all hidden behind doors!
-
Display + function – Open upper shelves let you style the top while keeping everyday items within reach. You can even use as extra counter space or working space!
-
Great Size – Tall and wide, this cabinet delivers tons of storage, and is big enough to hold large towels
-
Well Thought Out Plans – Only one sheet of plywood and you can build all this! Simple construction, basic tools, and a polished look you’ll be proud of
How I Built this Project
This project is built from one sheet of 3/4″ thick plywood.

I ripped it into three strips 15-1/4″ wide by 8 feet long, using a circular saw and a guide. Here’s some awesome guides that I recommend to help making ripping easier.

Next, I crosscut the plywood pieces to length using a miter saw. The cut list below details out exactly what size pieces to cut.

The plywood edges for the fronts of the pieces need to be finished. I used edge banding and an iron to attach. Here is a good tutorial and video on doing edge banding.

Next, I used my Kreg 720 Pocket Hole Jig to drill pocket holes and build the carcasses. You really need pocket holes for precision when trying to make a nice project like this one! I love the Kreg 720 because it auto adjusts, saving steps!

Then I attached the remaining pieces to build the carcass. I built two carcasses, they will stack so it’s easier to move into the room (see photos below).

For the back, I used 1/4″ underlayment, using 3/4″ brad nails and glue to attach. The plywood squares up the cabinet.
Now for the cabinet doors! I built them of course! I’m testing out a new method for building cabinet doors, and need some time to see how they hold up. In the meantime, here’s a few door tutorials to look through: Frame and Panel Doors Using 1/2″ plywood panel, Shaker doors with tablesaw and router, MDF Shaker Doors, or also consider ordering from an online cabinet company.

Once the doors were made, to install them, I used the Kreg Concealed Hinge Jig to quickly and easily install the concealed hinges on the cabinet doors.

Then just hung the doors in the cabinet. These concealed hinges are so adjustable, it’s hard to mess up!
For the upper cabinet, I did no doors. The lower cabinet I added doors.

Next just rolled on a good quality cabinet paint.
Once that is dry, I am going to install the adjustable shelves with shelf pins.

I used the Kreg Shelf Pin Jig to drill precise holes for the shelf pins, no rocking shelves!

Then stack the two cabinets, and add the shelves!

The last step is to install the hardware. I used my Kreg Cabinet Hardware Jig to quickly (and straight) drill holes for the knobs.
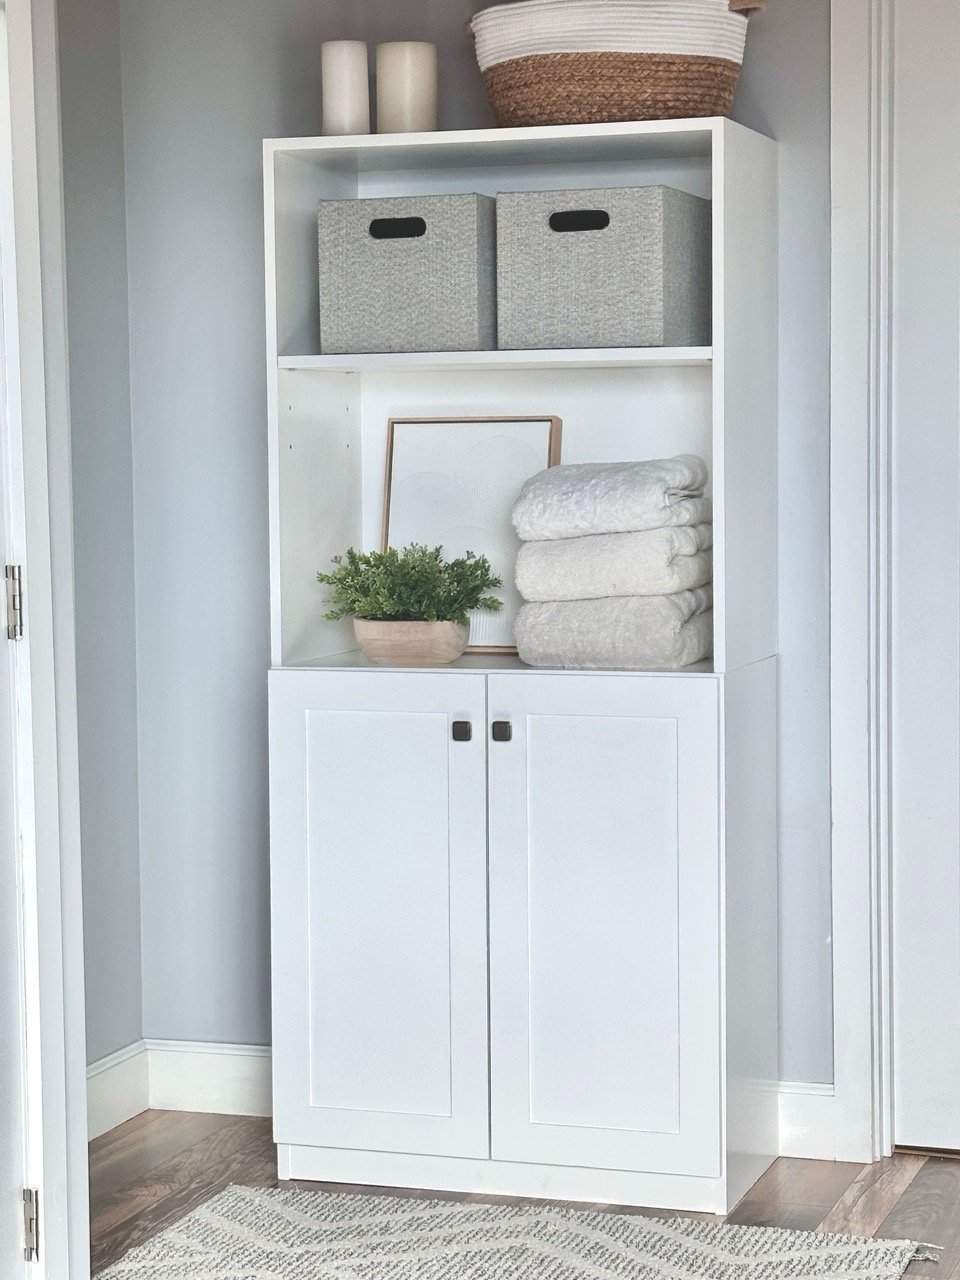
Here’s what one sheet of plywood and some doors looks like painted up –

I moved it into the house, this thing is HUGE. I am so glad I built it in the two pieces so it was easy to move. It holds a TON, like everything you would need to store can fit in there. That’s three extra large bath towels folded in there.
We are thrilled with how this tall bathroom cabinet turned out and see it as a forever project for our home!
Watch! Build Video for This Project
VIDEO COMING SOON
Free Plans to Build Your Own Bathroom Tall Boy Cabinet
Ready to build this yourself? Here’s the free plans, enjoy!