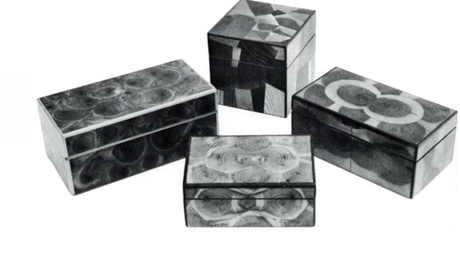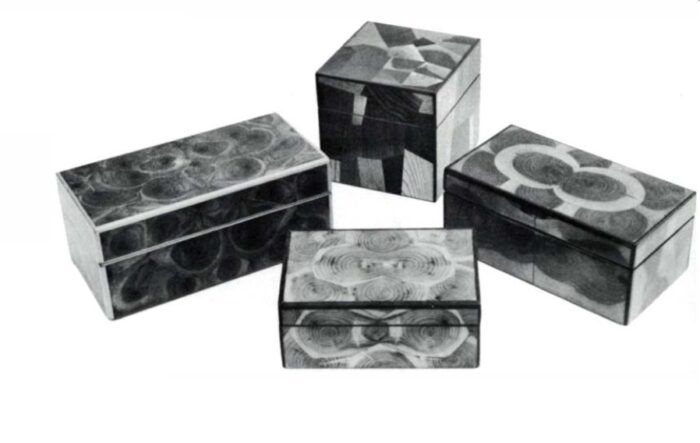
When a branch from a tree is cut transversely into thin slices and then applied to the surface of a box or piece of furniture, the grain and shape of the slices resemble oyster shell. Hence the name of this traditional decoration technique: oyster-shell veneering. Ernest Joyce, in his fine book, The Encyclopedia of Furniture Making, mentions the method, and that, along with the picture of a beautifully veneered cigarette box, led me to try my luck oyster-shelling a small plywood box. An unproductive plum tree provided wood with close grain, deep reddish heartwood, and creamy sapwood—most attractive for the purpose. A locust branch, ochre in the center, helped me discover more tricks of the trade.
Cutting round sections on the bandsaw is easier and safer if you put a clamp on the branch or trunk to prevent rolling. You can cut smaller branches on the table saw or radial arm saw. Cutting diagonally rather than straight across yields oval shapes, which look more like an oyster shell. Also, angling the cut varies the grain pattern though it also creates a problem in grain direction, which must be taken into account in the final scraping of the surface. I cut my slices freehand about 1/8 in. thick and stack them with narrow spacers between. Joyce suggests weighting down the stack, and that works fairly well until you accidentally knock one over. Binding the stack with strips of inner tube keeps the slices flat and permits easily moving the stacks from one place to another.

Being thin, the slices dry quickly. I experimented with burying the slices in dry sand, putting several thicknesses of newspaper between them in the stacks, and clamping them with cauls and no spacers or paper. The sand was the least effective because it provided no pressure and allowed the pieces to cup and check badly. Short lengths of branch, however, can be buried in sand with better results. Coating the ends of the branches with glue also helps to reduce checking. I put one of the stacks on top of the oil burner to hasten the drying time—a lesson in patience. The stickered stacks that dried more slowly in my cool shop produced more check-free slices, though even the ones that did check with the other methods gave much usable material.
When the oysters are dry you can cut them into squares, rectangles, polygons, or fit one to another in the more natural curves of the round sections. In any case, the joints should be hairline. Obviously, straight edges are easier to fit and keep square; I use a shooting board and a block plane. Check the fit of the joint by holding the pieces up to a bright light. High spots can be cut down and checked again. In working with curved joints you can sometimes chase high spots from one end of the curve to the other since removing wood from one spot changes the relationship of other segments of the curve. Whatever the shape of the pieces, keep in mind the size and shape of the surface to be covered so the finished product will have a balanced pattern. You can bookmatch adjacent slices from the branch to start a pattern in the middle and balance it with other matching pieces toward the edges.
When you’ve achieved a satisfactory fit, glue the pieces together one, or perhaps two, at a time. If the pieces are square you can glue a whole row at once. One could lay out a whole panel in jigsaw-puzzle fashion and glue it all at once, but probably the joints will be tighter and assembly less nerve wracking doing it more gradually. Trials with adhesives including white glue, Weldwood, yellow glue, and epoxy came out in favor of five-minute epoxy. You can mix it in quantities small enough for each joint and its strength and speed of setting enable the work to move along quickly. A board covered with a piece of polyethylene and held in the vise is a good assembly surface. Polyethylene releases any glue and obviates the necessity of scraping off paper. Small clamps hold the pieces in place while the glue sets and thus prevent warping. Clamp down all the edges and not just the joint: The oysters tend to curl if not held flat. When you’ve assembled an area large enough to cover the surface to be veneered, trim the assembly a bit oversize and clamp or weight it between cauls until you apply it to the surface. Level any high spots.

Now construct a box to receive the assembled oyster-shell veneers. Plywood offers a more stable base than solid wood, multi ply birch being the easiest to work. A box of 3/8-in. ply, with the panels adding another 3/32 in. or a little less, does not look clumsy and has adequate area for fastening hinges. My joinery is simple. I rabbet the front and back of the box and dado the sides, all of which I glue and nail together. The top and bottom I butt-join, glue, and nail. Because the veneer will cover the entire outside, the joinery is concealed; any strong, simple joint will do. The box has no opening yet; cutting off the top is a later step.
Before gluing, coat the back of the panels with a thin layer of glue and let it dry to increase the strength of the end-grain glue bond. Trim each panel flush with the edges of the box. When all the panels are glued and clamped in place and the glue has set, scrape the surface level, taking care to scrape toward the center to avoid chipping the edges. When two obliquely cut pieces have been bookmatched, you can best handle the abrupt change of grain at midpanel by scraping across both. A heavy power-hacksaw blade with the teeth ground off and all edges ground square makes an excellent scraper. It is 12 in. long, flexible, and made of superior steel. Square grinding on a fine wheel gives an edge that holds, and its length provides the equivalent of half-a-dozen ordinary scrapers. When the section being used becomes dull, it is only a matter of moving down the blade a few inches to have a brand-new edge. And there are four edges. The edge that had the teeth remains a little wavy after they have been ground off, and this edge gives a rougher but faster cut. An old Victrola spring has also given me yards of excellent scrapers. A belt sander with an 80-grit belt will cut down the excess quickly, but take care to avoid burning the wood. In one trial with yellow glue, the heat of the sander softened the glue. Excessive heat can also cause checking and warping.
When you’ve completed scraping, cut a rabbet all around the top and on all four corners to accommodate a strip of edging the thickness of the panel. Cut the edging oversize, and scrape it down level with the surface. A contrasting color, either lighter or darker than the ground color, looks attractive. Narrow strips of inner tube wrapped about the box make satisfactory clamps for gluing the edging in place.

Now the whole box can be sanded to almost its finished state. There is more handling involved before completion, which may well result in scratches, so it is best to leave the final sanding till last. Cut the box open on the radial arm saw in its horizontal position, using a fine-tooth blade, or on the table saw. Take care to back up the corners with a piece of scrap to reduce the chance of splintering the edging.

If you’ve used plywood for the box, line the box with either veneer or Formica. White matte Formica gives a nice light interior and can easily be kept clean. Veneer the exposed edges of the plywood along with the bottom of the box. I usually set four plugs made with a plug cutter into the bottom for short feet, which keep the bottom from becoming scratched.
Finish the sanding in good light, checking for the scratches you don’t believe are there. They probably are. The final finish is to a large extent a matter of preference, but it’s important that the surface be thoroughly sealed. Polyurethane is durable and with a number of coats and careful rubbing gives a beautiful result. Watco oil gives a nice finish, too, and allows for touching up mars more readily than polyurethane. Watco is not moisture proof, however, and in one box finished with it there seems to be more expansion and contraction of the individual pieces.
Be prepared for wood movement. Cross-sectional pieces are highly sensitive to changes in moisture. Keep your finished boxes away from direct sunlight and radiators. To keep peeling and cracking to a minimum, cut the sections as thin as possible, size them before applying, and use a moisture-proof finish. Even so, you may have to accept small cracks and gluelines that vary in size as part of the design.
A variation that is not truly oyster work (since the wood does not contain the heart) can be made from all those small scraps you have hesitated to throw away. Many woods have beautiful and interesting end grain, and careful matching and mixing can result in a handsome piece of work.
Fine Woodworking Recommended Products
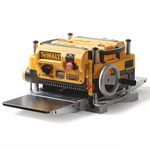
DeWalt 735X Planer
The DeWalt 735X produced two faces perfectly parallel to one another, with surfaces far superior to what the other machines produced, thanks to its two feed speeds. At high speed, the planer works fast and leaves a smooth surface. But the slower, finish speed produces an almost glass-smooth surface. Knife changes are easy, with spacious access to the cutterhead from the top and a gib screw wrench that doubles as a magnetic lift to remove the knives. The 735X also has great dust collection, thanks to an internal blower that helps evacuate chips. The port has a 2-1/2-in.-dia. opening, but has a built-in adapter for 4-in.-dia. hoses. My only complaint is the location of the dust port. It’s on the outfeed side of the machine, and exits straight back. If you don’t pull the hose to the side, it interferes with material as it leaves the machine. The top is large and flat, so it’s a great place to set material in between passes through the machine.
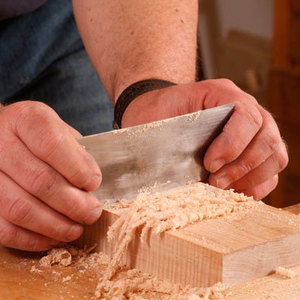
Bahco 6-Inch Card Scraper
The size and thickness are what matter here. A consistent performer, this Bahco scraper is found in many shops we visit.
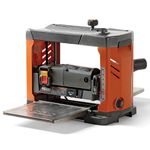
Ridgid R4331 Planer
Priced nearly $300 less than the DeWalt 735X, the Ridgid R4331 is an excellent value. Its three-knife cutterhead left wonderfully clean surfaces on plainsawn white oak and white pine. It did not perform nearly as well on curly maple as the 735X, but it created less tearout than all but one of the other machines (the DeWalt 734 was its equal). Knife changes were quick and easy with the provided T-handle wrench. Dust collection was good, assisted by an internal fan. The 2-1/2-in.-dia. port on the outfeed side of the machine is directed to the side, so the hose is out of the way. The planer’s top is flat and provides a good surface for holding stock between passes.
Sign up for eletters today and get the latest techniques and how-to from Fine Woodworking, plus special offers.
