Learn how to make a pretty DIY zipper pull charm using seashells or other small items! Perfect as a bikini charm, too, or on zippers year-round.
I was browsing Free People again and noticed that they have different bikini charms for sale. They either feature beads or little gemstones wrapped with macrame, and one has cowrie shells. That got me thinking about making my own, and since they have jewelry clasps, they are actually just like zipper pull charms, which gives you the option to wear them all year on various outfits. So today I want to show you how to make a DIY zipper pull charm that can also be used on your swimsuit. Take a wild guess, I made mine out of seashells I found on my beach walks.
Let me show you…

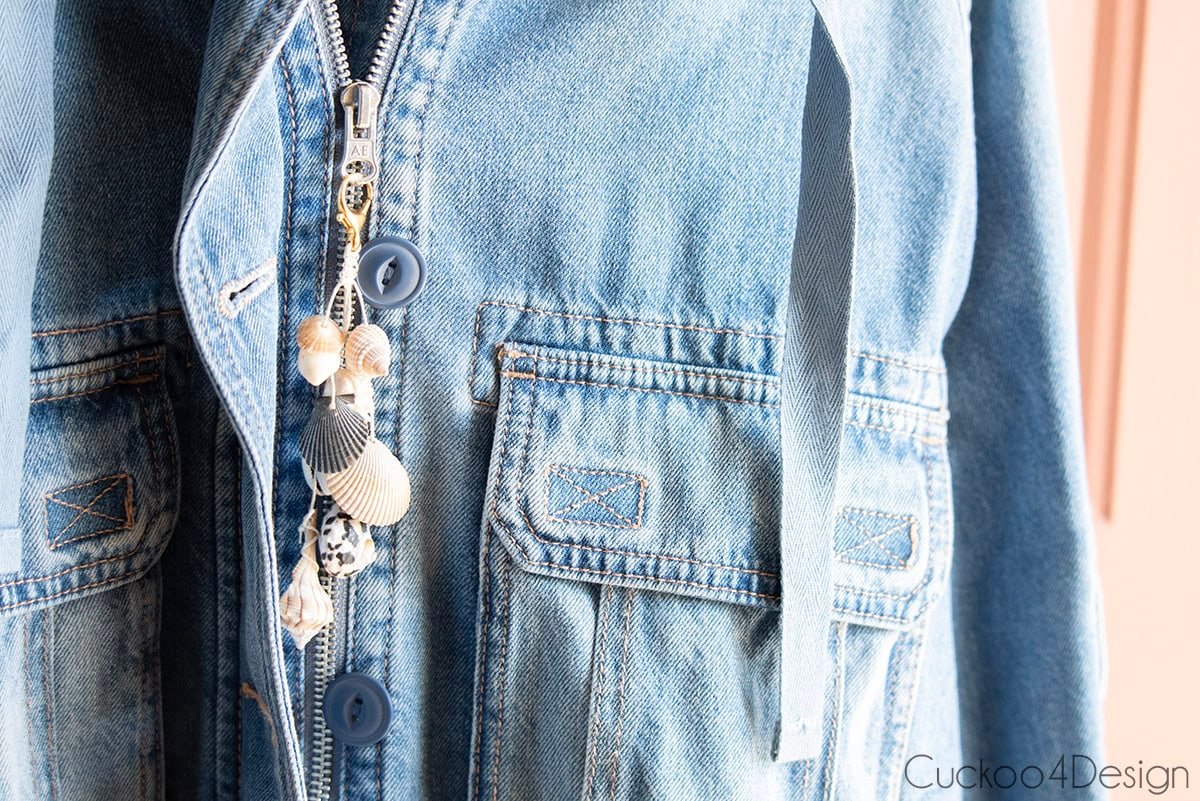
DIY zipper pull charm or bikini charm using seashells
This post may contain affiliate links from which I will earn a commission at no extra cost to you. View my full disclosure policy.
As I just mentioned above, I found this DIY tutorial idea while browsing Free People. You can really have fun with this little craft project and add all kinds of cute little details.
Here is the inspiration I am talking about. Use the arrows to see more, and the images will take you to the shop:

Materials needed
- large jewelry clasp ( I bought this one, but there are many other options like THIS one or THIS one)
- a variety of small seashells or beads or other small items like seaglass/stones or anything else that you love (mine were collected at the Jersey Shore, Florida, and the Dominican Republic)
- scissors
- Dremel, a small drill bit, and the smallest piece from a collet nut set (the tiny drill bit came with my micro hand drill)
- micro drill/hand drill
- thin hemp cord or waxed cord
- an old cutting board or something else to drill on to protect the surface you are working on
Zipper pull charm or bikini charm video tutorial
As always, I made a video for you to check out. If it doesn’t load here, then you can also watch it on my YouTube channel instead. Or maybe you’d like to follow my channel 🙂
I apologize in advance for my dirty fingers, but I was mulching while also working on this project, and I didn’t even notice how filthy they really were until I started to edit this video close up. Oops!
Step-by-step instructions
Step 1: How to attach the Dremel drill bit
For this project, I had to purchase an even smaller Dremel attachment (collet nut kit) to hold the tiny drill bit since the seashells were so much smaller than previous seashells used in my craft projects.
The tiny drill bits came with my micro hand drill and were perfect for this craft project. The size of the drill bit also matched the size of the hemp cord used.
In the left image, I inserted the collet into the Dremel with the tiny drill bit inserted into that collet. Then you simply screw on the collet nut while pressing on the blue button to stop the Dremel from spinning while you tighten the collet nut. That’s all there’s to it.

Step 2: Picking your seashells
Gather all your small decorative pieces that you want to use. For my project, I only used various small seashells that I found over the years. I tried to use all kinds of different colors and shapes.

Step 3: Drilling a hole into the seashells
To be honest, I ruined several seashells while drilling holes. Some just fell completely apart, which was a bummer.
Make sure you hold the seashell or whatever else you are using tightly in place with your hands. You could also put a pebble into a vice, but that didn’t work for the tiny seashells. Turn on the Dremel and carefully press the drill bit onto the object. If you press too hard, you risk breaking it.

Or, as I mentioned in my other seashell tutorials, you can use a small micro hand drill as well. If they are thin and brittle shells, then I actually recommend the hand drill. I used the hand drill on my small, dark gray bay scallop.
Simply press the micro hand drill onto your seashell and spin it while holding the seashell in place with your other hand.

Step 4: Cutting the hemp cord and threading it through the clasp
The clasp that I am using has a small hole to either attach another jewelry ring to or, in my case, to thread some cord through. If you are using one of the clasp rings that I showed in my supply list, then you can just knot the cord right to the ring clasp.

Cut two pieces of hemp cord at about 15 inches long (images 1 and 2) and then thread them through the clasp hole (image 3). Position the clasp in the center of the hemp cord folded in half (images 4 and 5).

Step 5: Square Knotting the hemp cord (optional)
I decided to do some Square Knotting just because I wanted to add some extra detail. I also love macramé. So, if you want to make this project easier than just double knot the hemp cord right below the clasp hole and move on to the next step.
(You can tape the clasp to your surface. In my video, I’m showing you that not taping it also works.)
Take the right hemp cord and place it over the two center cords (image 1). Then take the left hemp cord and place it over the right piece of hemp cord (image 2) and loop it through the right hemp cord behind the two center cords (images 3 and 4). Pull the knot tight.
Now alternate the same type of knot by starting with the left hemp cord over the two center cords (images 6, 7, and 8).
You can make as many Square Knots as you’d like. I made about 5 of them.

And that’s all there is to it! I think this is a really cute little project and perfect for any beach lover. What do you think?
Tschüß,

Materials
- large jewelry clasp
- a variety of small seashells or beads or other small items like seaglass/stones or anything else that you love (mine were collected at the Jersey Shore, Florida, and the Dominican Republic)
- thin hemp cord or waxed cord
- an old cutting board or something else to drill on to protect the surface you are working on
Tools
- scissors
- Dremel, a small drill bit, and the smallest piece from a collet nut set (the tiny drill bit came with my micro hand drill)
- micro drill/hand drill
Instructions
- How to attach the Dremel drill bit
For this project, I had to purchase an even smaller Dremel attachment (collet nut kit) to hold the tiny drill bit since the seashells were so much smaller than previous seashells used in my craft projects.The tiny drill bits came with my micro hand drill and were perfect for this craft project.
In the left image, I inserted the collet into the Dremel with the tiny drill bit inserted into that collet. Then you simply screw on the collet nut while pressing on the blue button to stop the Dremel from spinning while you tighten the collet nut. That’s all there’s to it.
- Picking your seashells
Gather all your small decorative pieces that you want to use. For my project, I only used various small seashells that I found over the years. I tried to use all kinds of different colors and shapes. - Drilling a hole into the seashells
To be honest, I ruined several seashells while drilling holes. Some just fell completely apart, which was a bummer.Make sure you hold the seashell or whatever else you are using tightly in place with your hands. You could also put a rock into a vice, but that didn’t work for the tiny seashells. Turn on the Dremel and carefully press the drill bit onto the object. If you press too hard, you risk breaking it.
Or, as I mentioned in my other seashell tutorials, you can use a small micro hand drill as well. If they are thin and brittle shells, then I actually recommend the hand drill. I used the hand drill on my small, dark gray bay scallop.
Simply press the micro hand drill onto your seashell and spin it while holding the seashell in place with your other hand.

- Cutting the hemp cord and threading it through the clasp
The clasp that I am using has a small hole to either attach another jewelry ring to or, in my case, to thread some cord through. If you are using one of the clasp rings that I showed in my supply list, then you can just knot the cord right to the ring clasp.Cut two pieces of hemp cord at about 15 inches long (images 1 and 2) and then thread them through the clasp hole (image 3). Position the clasp in the center of the hemp cord folded in half (images 4 and 5).
(You can tape the clasp to your surface. In my video, I’m showing you that not taping it also works.) - Square Knotting the hemp cord (optional)
I decided to do some Square Knotting just because I wanted to add some extra detail. I also love macrame. So, if you want to make this project easier than just double knot the hemp cord right below the clasp hole.
Take the right hemp cord and place it over the two center cords (image 1). Then take the left hemp cord and place it over the right piece of hemp cord (image 2) and loop it through the right hemp cord behind the two center cords (images 3 and 4). Pull the knot tight.
Now alternate the same type of knot by starting with the left hemp cord over the two center cords (images 6, 7, and 8).
You can make as many Square Knots as you’d like. I made about 5 of them. - Knotting the seashells to the hemp cord
This part of the tutorial is literally the same as my seashell tassel. The only difference is that it is all on a much smaller scale and that I used a lot fewer seashells. I didn’t want the zipper pull charm to look like a tassel.
Simply thread on a shell and follow that with a double knot at the location where you want the seashell to hang. I added two seashells on one strand.
Now, all you have to do is stagger the rest of the seashells (or whatever else you are using) onto the remaining three hemp cords in the exact same way. The nice thing is that you can unknot the strands and adjust the shells.
Trim the access cords at the bottom.