If you missed yesterday’s post, then the information in this post will be a bit confusing. So you may want to read yesterday’s post first. But if you’re all caught up on the change of design for the cabinets on the mural wall of the studio, then let’s move on.
First up, I got two more panels of the mural installed! When I was planning to use the upper cabinets on the mural wall, I needed eight panels of the mural. I ordered ten panels so that I could have two extras (one extra of each panel) just in case something went wrong with the installation (e.g., if I ripped one or something like that). Fortunately, nothing went wrong during the original install, so I had these two on hand and got them on the wall last night.
Once I got them up, I was thrilled with having more flowers on that wall (which, again, will not be blocked by upper cabinets because the plan for upper cabinets has been axed), but I also just stood there shaking my head at the fact that those two panels covered everything except about two inches of wall on the left, and about four inches of wall on the right. 😀 I’m six inches shy of having the whole wall covered.

I posted that photo on my Facebook page last night to see if anyone had any clever suggestions, but the majority said I just need to buy the extra wallpaper to cover those six inches. *Sigh* They’re right, of course. So that’s what I did. Unfortunately, since this is a two-piece mural and not regular wallpaper, I had to buy two more rolls because the strip that I need for the left comes from Panel 1 of the mural, and the strip that I need on the right comes from Panel 2 of the mural. Of course. 😀
But it’s fine. The wallpaper is ordered, and in the meantime, I can get those windows trimmed out. That will go a long way towards giving this wall a finished look.
So what about the countertop? If you’ll remember from this post where I showed you how I made this long 20-foot countertop on the mural wall, I got most of the countertop covered with the laminate flooring, but I was short one board. At that time, I was still planning on using those upper cabinets that would sit directly on top of the countertop, so I simply spaced the boards just right so that them missing pieces would be in the far back corners at each end of the countertop, and hidden by the upper cabinets. But now that I don’t plan on using upper cabinets on the mural wall, those areas are now going to show, and I need that extra flooring board to finish up the countertop.
I called LL Flooring to see if I could buy just one piece. Nope, I can’t. I asked if they have samples, and they do, but their samples aren’t full floor boards. They cut those boards into much smaller pieces to give out as samples. So the woman I spoke with said that if I needed just one more full piece, I’d have to buy a whole package of flooring.
I just couldn’t bring myself to do that. It’s not that it would break the bank, but it’s just the principle of the thing. 😀 I mean, if I absolutely couldn’t find another solution, obviously, I’d have to do it. But I wanted to make sure I had exhausted every other possibility first.
Well, I found a solution, and all I have to do is make a minor change in my plan for the other section of cabinets — the cabinets in the office section of the room — so that I can steal a floor board from that countertop to use on the mural wall countertop.
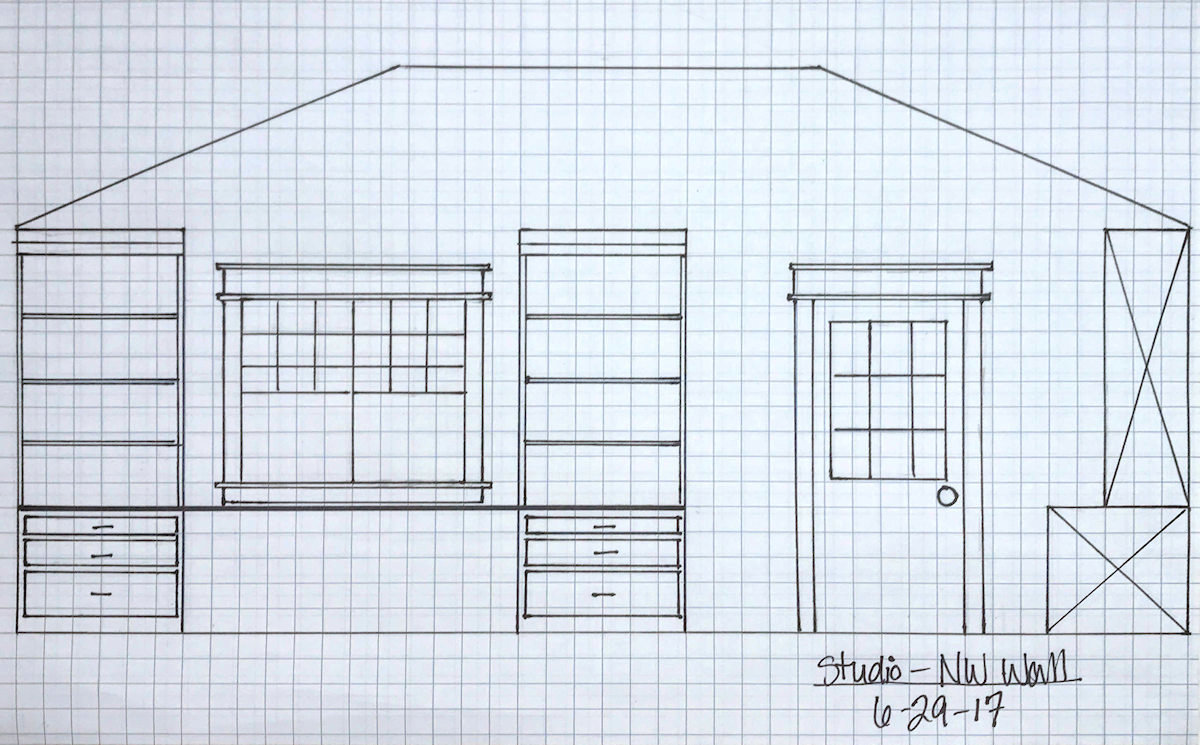
In order for me to explain the change I’m making, let me first back up and remind you how the original plan for this office area (which is on the wall perpendicular to the mural wall) originally looked. I had planned for two lower cabinets with an open area in the middle to be used as a desk area, with a countertop spanning the entire width of the lower cabinets, and then upper open shelves flanking the window.
Then when I decided to go with IKEA cabinets instead of building my own, I decided to eliminate the open desk area (since I have an actual desk in the room) and fill in that open desk area with more cabinets.
So the plan as of a few days ago was to have four lower 15-inch-deep cabinets installed so that they sit away from the wall a few inches, and then put a countertop over the whole span of lower cabinets, and then put the upper 15-inch-deep cabinets on top of the countertop flanking the window and installed right against the wall so that they sit back a few inches from the lowers. Those uppers were going to be open shelves. You can see the lowers installed with the countertop started (the original countertop that I made incorrectly) in the picture below.

Thankfully, when I was working on this countertop (the one I messed up on), I never got the point of actually adhering the flooring boards to top the MDF, so I still have all of those boards, and they’re perfectly fine and uncut. I have just enough flooring boards to span that entire width of lower cabinets.
So when I was trying to figure out a way to steal one flooring board from this countertop to finish up the long 20-foot countertop on the mural wall, I remembered that I had saved a picture of an office done with IKEA cabinets from House With Home, and the whole arrangement looked similar to what I had in mind…with one change that could very well result in me having a flooring board left over.
So after doing some measuring and marking and rearranging of the floor boards I had set aside for my office area countertop, I discovered that if I make this change, I will have exactly ONE spare flooring board! And since I messed up my first attempt at this countertop (more about that here), and it has to be redone anyway, making this small change (i.e., stacking those cabinets that flank the window directly on top of each other instead of separating them with a countertop, and just having the countertop between those tall tower cabinets) will be super simple. And to be quite honest, I like the look of Katie’s end cabinets (i.e., not separated by a countertop) much better than my original plan. It would be different if I were using 24-inch-deep lowers 15-inch-deep uppers. But since all of the cabinets in this section are 15 inches deep, this new design makes more sense.
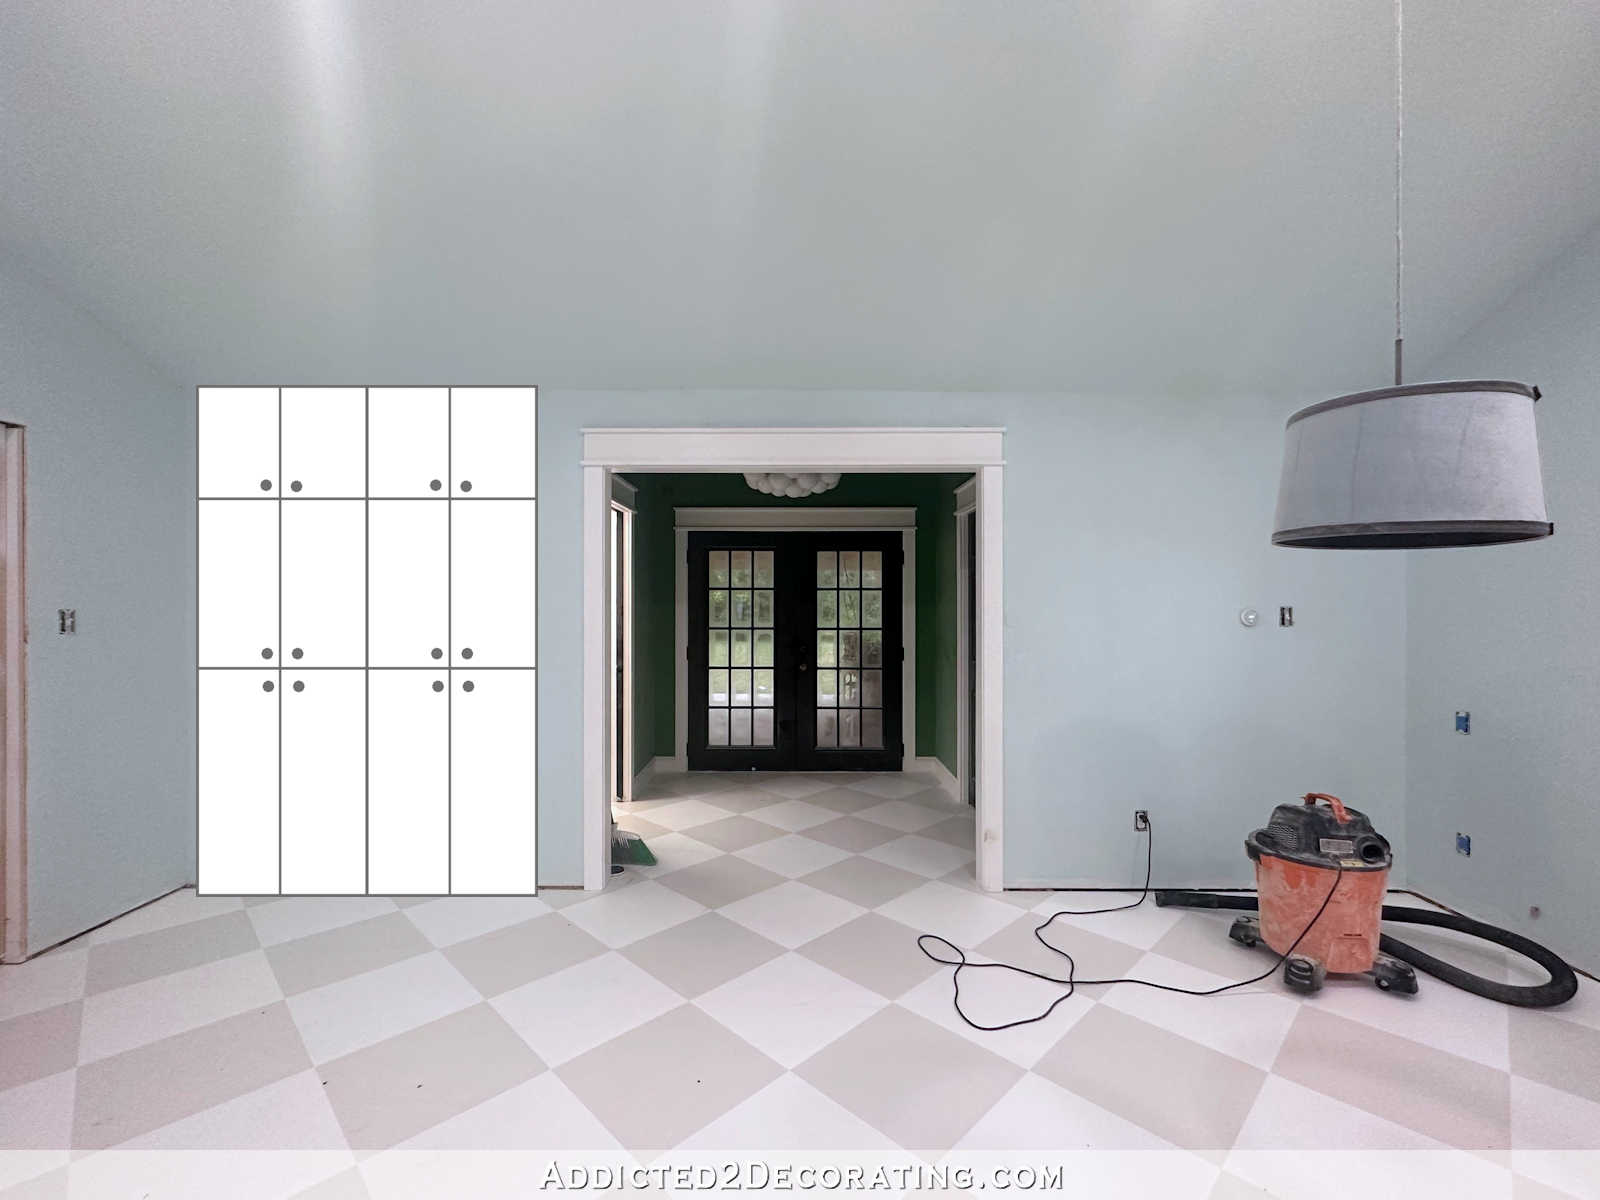
So with these changes that I’m making, I needed to place another order from IKEA. As I mentioned yesterday, the two cabinets that I had planned to use as upper cabinets on the long mural wall are now being moved to the area just inside the door coming from the breakfast room.

Since those cabinets are only 30 inches wide and 40 inches high, I needed more cabinets to go with them to complete the wall. I decided to keep things simple and just stick with all cabinets with doors and shelves. Since they’ll all be 15 inches deep, I didn’t see any need to have drawers since drawer boxes would just decrease the amount of valuable storage space, and items are not likely to get pushed to the back and forgotten or difficult to retrieve in a 15-inch-deep cabinet.
So the cabinets on the wall just inside the door from the breakfast room will be 60 inches wide and 90 inches high, plus I’ll add the same base that I’m adding to the rest of the cabinets in the room, as well as crown molding. The 40-inch-tall cabinets that I already have will go on the bottom, and then new 30-inch-tall cabinets will go on top of those, and then the top will be finished off with new 20-inch-tall cabinets, giving me a total of 90 inches of height and 60 inches of width in this new storage area.
And while I was at it, I also ordered a few new things for the office area cabinets. So let’s focus again on those office area cabinets (i.e., the wall perpendicular to the 20-foot mural wall), and I’ll share a couple more details.
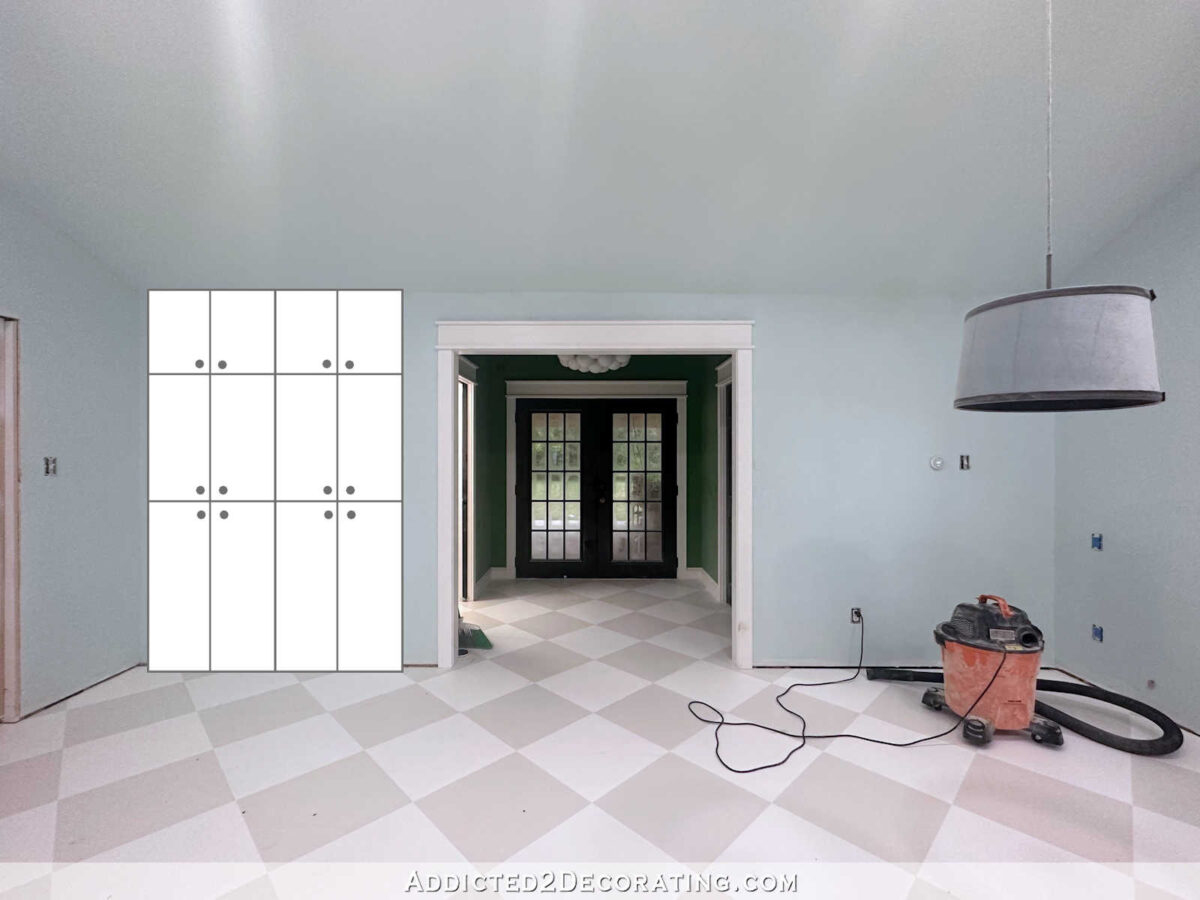
In order to complete my two uninterrupted towers of cabinets that flank that single window in the office area, I ordered two 20-inch-high drawer units to sandwich in between the existing lower cabinets and the upper cabinets that I already have (but haven’t yet assembled). I also purchased doors to go on the upper cabinets, which I had originally planned as open shelves. So with these small changes, the finished look will be something closer to this…

So basically, my plan went from a studio with four open shelf units being used as upper cabinets and sitting on top of countertops (two in the office area and two on the mural wall) to now having no upper open shelves on the mural wall, and closed upper cabinets in the office area of the room. With this new plan, there won’t be any open shelves anywhere in the studio. All of the storage will be enclosed, and I wont have to spend time styling open shelves and keeping them pretty. I think this will make all of my cabinets much more useful.
All of the new cabinets will be here next Wednesday. In the meantime, I have plenty to keep me busy!

Addicted 2 Decorating is where I share my DIY and decorating journey as I remodel and decorate the 1948 fixer upper that my husband, Matt, and I bought in 2013. Matt has M.S. and is unable to do physical work, so I do the majority of the work on the house by myself. You can learn more about me here.